Mongoose 101: Population
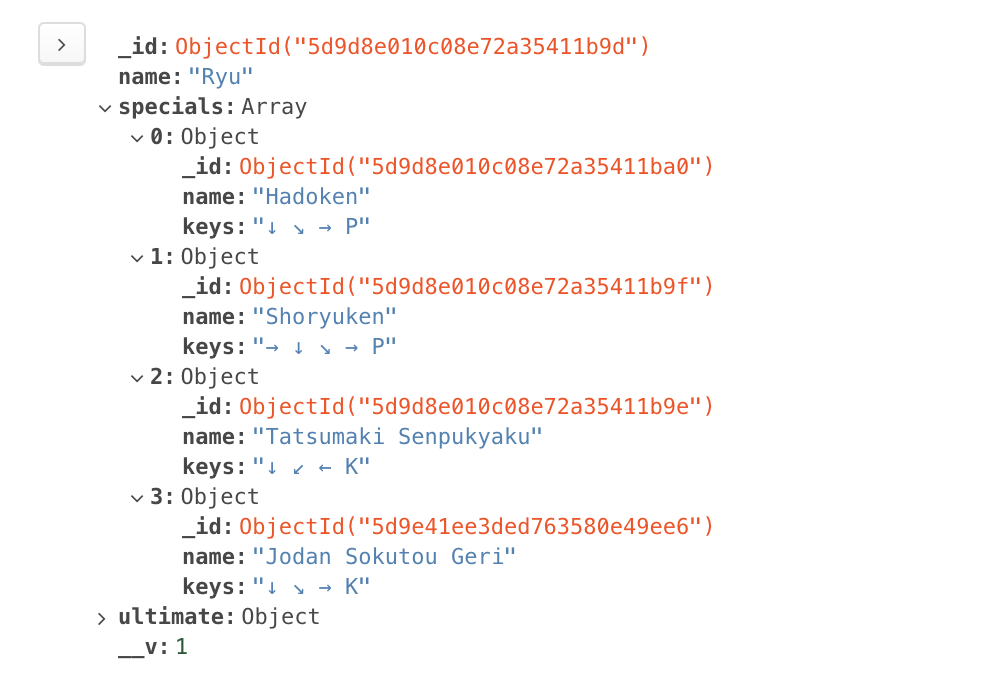
MongoDB documents have a size limit of 16MB. This means you can use subdocuments (or embedded documents) if they are small in number.
For example, Street Fighter characters have a limited number of moves. Ryu only has 4 special moves. In this case, it’s okay to use embed moves directly into Ryu’s character document.

But if you have data that can contain an unlimited number of subdocuments, you need to design your database differently.
One way is to create two separate models and combine them with populate.
Creating the models
Let’s say you want to create a blog. And you want to store the blog content with MongoDB. Each blog has a title, content, and comments.
Your first schema might look like this:
const blogPostSchema = new Schema({
  title: String,
  content: String,
  comments: [{
    comment: String
  }]
})

module.exports = mongoose.model('BlogPost', blogPostSchema)
There’s a problem with this schema.
A blog post can have an unlimited number of comments. If a blog post explodes in popularity and comments swell up, the document might exceed the 16MB limit imposed by MongoDB.
This means we should not embed comments in blog posts. We should create a separate collection for comments.
const comments = new Schema({
  comment: String
})

module.exports = mongoose.model('Comment', commentSchema)
In Mongoose, we can link up the two models with Population.
To use Population, we need to:
- Set
typeof a property toSchema.Types.ObjectId - Set
refto the model we want to link too.
Here, we want comments in blogPostSchema to link to the Comment collection. This is the schema we’ll use:
const blogPostSchema = new Schema({
  title: String,
  content: String,
  comments: [{ type: Schema.Types.ObjectId, ref: 'Comment' }]
})

module.exports = mongoose.model('BlogPost', blogPostSchema)
Creating a blog post
Let’s say you want to create a blog post. To create the blog post, you use new BlogPost.
const blogPost = new BlogPost({
  title: 'Weather',
  content: `How's the weather today?`
})
A blog post can have zero comments. We can save this blog post with save.
const doc = await blogPost.save()
console.log(doc)

Now let’s say we want to create a comment for the blog post. To do this, we create and save the comment.
const comment = new Comment({
  comment: `It's damn hot today`
})

const savedComment = await comment.save()
console.log(savedComment)

Notice the saved comment has an _id attribute. We need to add this _id attribute into the blog post’s comments array. This creates the link.
// Saves comment to Database
const savedComment = await comment.save()

// Adds comment to blog post
// Then saves blog post to database
const blogPost = await BlogPost.findOne({ title: 'Weather' })
blogPost.comments.push(savedComment._id)
const savedPost = await blogPost.save()
console.log(savedPost)
 Blog post with comments.
Searching blog posts and its comments
If you tried to search for the blog post, you’ll see the blog post has an array of comment IDs.
const blogPost = await BlogPost.findOne({ title: 'Weather' })
console.log(blogPost)

There are four ways to get comments.
- Mongoose population
- Manual way #1
- Manual way #2
- Manual way #3
Mongoose Population
Mongoose allows you to fetch linked documents with the populate method. What you need to do is call .populate when you execute with findOne.
When you call populate, you need to pass in the key of the property you want to populate. In this case, the key is comments. (Note: Mongoose calls this the key a “path”).
const blogPost = await BlogPost.findOne({ title: 'Weather' })
  .populate('comments')
console.log(blogPost)

Manual way (method 1)
Without Mongoose Populate, you need to find the comments manually. First, you need to get the array of comments.
const blogPost = await BlogPost.findOne({ title: 'Weather' })
  .populate('comments')
const commentIDs = blogPost.comments
Then, you loop through commentIDs to find each comment. If you go with this method, it’s slightly faster to use Promise.all.
const commentPromises = commentIDs.map(_id => {
  return Comment.findOne({ _id })
})
const comments = await Promise.all(commentPromises)
console.log(comments)

Manual way (method 2)
Mongoose gives you an $in operator. You can use this $in operator to find all comments within an array. This syntax takes effort to get used to.
If I had to do the manual way, I’d prefer Manual #1 over this.
const commentIDs = blogPost.comments
const comments = await Comment.find({
    '_id': { $in: commentIDs }
})

console.log(comments)

Manual way (method 3)
For the third method, we need to change the schema. When we save a comment, we link the comment to the blog post.
// Linking comments to blog post
const commentSchema = new Schema({
  comment: String
  blogPost: [{ type: Schema.Types.ObjectId, ref: 'BlogPost' }]
})

module.exports = mongoose.model('Comment', commentSchema)
You need to save the comment into the blog post, and the blog post id into the comment.
const blogPost = await BlogPost.findOne({ title: 'Weather' })

// Saves comment
const comment = new Comment({
  comment: `It's damn hot today`,
  blogPost: blogPost._id
})
const savedComment = comment.save()

// Links blog post to comment
blogPost.comments.push(savedComment._id)
await blogPost.save()
Once you do this, you can search the Comments collection for comments that match your blog post’s id.
// Searches for comments
const blogPost = await BlogPost.findOne({ title: 'Weather' })
const comments = await Comment.find({ _id: blogPost._id })
console.log(comments)

I’d prefer Manual #3 over Manual #1 and Manual #2.
And Population beats all three manual methods.
Thanks for reading. This article was originally posted on my blog. Sign up for my newsletter if you want more articles to help you become a better frontend developer.
