CGPA Calculator with AdonisJS: API Testing
Testing is an important part of any software development project. Testing gives us confidence in our code and helps us catch bugs before deployment. Welcome to part 5 of this series. We wrote the final APIs in part 4. Now, we will write functional tests for our APIs. If you will like to skip the previous steps, clone the repo and checkout to the more-relationships-and-seeding branch, then code along.
Functional Testing
According to Wikipedia
Functional testing is a quality assurance (QA) process and a type of black-box testing that bases its test cases on the specifications of the software component under test.
Basically, functional tests are written in a way that matches how a real user will interact with the app. Take, for example, we want to test course addition from scratch. We will
- Open a headless or real browser
- Navigate to the register page
- Register the user
- Navigate to the course addition form
- Fill in the details
- Sumit the form
We will have a test that will carry out these steps and ensure no error is thrown. If an error is thrown, then our tests fail and we will have to investigate what went wrong.
Getting started testing Adonis apps
@adonisjs/vow, the standard library built for the framework uses chai under the hood for assertions. We will mainly be testing using assertions. Get started by installing vow
adonis install @adonisjs/vow
The installation adds three files to your project. Add the configuration to the aceProviders array of app.js
const aceProviders = [
  // ...other providers
  '@adonisjs/vow/providers/VowProvider'
]
You can see how testing works by testing example.spec.js
adonis test
Output
  Example
    ✓ make sure 2 + 2 is 4 (2ms)

   PASSED

  total       : 1
  passed      : 1
  time        : 6ms
Pre-testing checklist: Suites and Traits
Below is the content of the example test file.
'use strict'

const { test } = use('Test/Suite')('Example')

test('make sure 2 + 2 is 4', async ({ assert }) => {
  assert.equal(2 + 2, 4)
})
Notice that we are destructuring the test function from Test/Suite. Since we are testing APIs, we need a JS version of Postman. This is provided by Test/ApiClient, a trait. Traits were implemented to keep the test runner lean, so any desired functionality is required when needed.
Basically, we obtain trait from Suite and require the Test/ApiClient trait. Since some of our routes require authentication, we also require the Auth/Client trait.
const { test, trait } = use("Test/Suite")("Example");

trait("Test/ApiClient");
trait("Auth/Client");
To understand more about Suites and Traits, I suggest you read the docs. The Adonis team did a job explaining Suites and Traits.
Our first tests
We will structure our tests such that each controller will contain tests for each method. Go ahead and delete example.spec.js, then run this
adonis make:test User -f
# output: create: test/functional/user.spec.js
Replace the content of user.spec.js with this
"use strict";

const { test, trait } = use("Test/Suite")("User");

trait("Test/ApiClient");
trait("Auth/Client");

const User = use("App/Models/User");
Testing registration
We'll follow the convention of using the present tense on test cases. Here, we are testing the register route and asserting that the status is 201.
test("registers a new user", async ({ client }) => {
  const response = await client
    .post(`/api/v1/register`)
    .send({
      email: "test-user@email.com",
      password: "some password",
      grade_system: "5",
    })
    .end();

  await response.assertStatus(201);
});
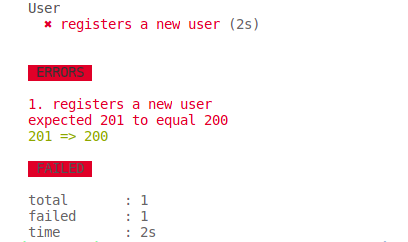
Kent C. Doods always says to ensure your test is working, feed it a wrong assertion. So we'll asset a 200 and run our tests.
- response.assertStatus(201);
+ response.assertStatus(200);
Now, run the tests

Our tests said expected 201 to equal 200. We know that it is meant to be 201, so it means our test is working. Now return the assertion to its previous state and run the tests again.

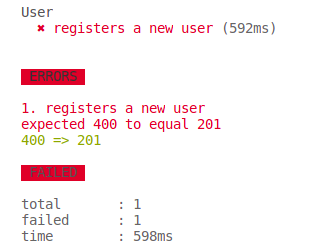
Huh 🤨? 400? Remember that the register() method in UserController.js returns errors for non-unique emails. We should probably write a test for that too eh? Change the email and run the test again.

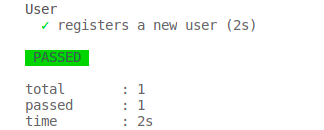
Hurray 🎊! It worked! That felt manual and isn't ideal. You know what will be better? A separate testing database which will be migrated and seeded before any tests run and revert the migrations after all the tests have run.
Configuring the testing setup
First things first, let's create a testing DB. If you are using sqlite, create one in the database directory.
touch database/testing.sqlite
If you are using a different DB, create a testing database. Name it whatever you wish.
In .env.testing, add your database name
DB_DATABASE=testing
.env.testing is used to override the default values of .env when testing.
We will complete our configuration in vowfile.js. vowfile.js is used for pre-tests and post-tests setup. First of all, uncomment the ace import: // const ace = require('@adonisjs/ace'). In the runner.before function, uncomment // await ace.call('migration:run', {}, { silent: true }) and add this below it
await ace.call('seed', {}, { silent: true })
Likewise, in runner.after, uncomment // await ace.call('migration:reset', {}, { silent: true }).
Now, run your tests multiple times to verify that we don't run into that 400 again.
Testing an auth only route:
Let's test a route that requires authentication: update/profile. First, we will create the case alongside a test user.
test("updates a user's profile", async ({ client }) => {
  const user = await User.create({
    email: "some-other-email@email.com",
    password: "some password",
  });
});
Then we call the API with a loginVia method attached. Note that we won't be able to use loginVia without requiring trait("Auth/Client"). Finally, we assert the status to be 200 and the returned JSON to contain the names.
  response.assertStatus(200);

  response.assertJSONSubset({
    firstName: "John",
    lastName: "Doe",
  });
We could have also used assertJSON, but it will require that we include every field of the returned JSON. This may not be ideal for every case. Learn more about assertions here.
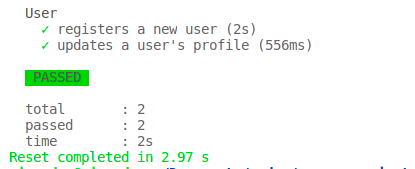
Test the new test case.

So, what now?
Now, you test the other routes. Write as many test cases as you deem fit. If you compare your tests with mine, checkout the main branch on this repo
Farewell
It's been 5 articles of bravery and honour. It can't deny how impressed I am to see you become an Adonis hero my young warlock. No that's not right, we've been writing APIs 😂. But it's been quite a journey. I hope you enjoyed every bit of it. Please I need your honest feedback on
- The tutorial style
- If I explained too much
- The minimal use of images and memes.
Feel free to add a comment. I really want to grow as a writer and your feedback matters a lot. Thank you for following along. Adios ✌🏾🧡.

I followed all your steps in this tutorial, all I get is a white screen even after I add all the HTML buttons and components. I’ve recompiled webpack numerous times, same result.Actually I’ve just fixed my issue. I deleted everything within node_modules, and simply ran npm install, as per your original package.json file contents. The key to making it run was babel-loader needs to be exactly at 7.0.0. Afterwards, I ran ‘$ npm install --save-dev style-loader css-loader --no-bin-links’ which helped with the CSS files. Finally, I ran webpack again and started the server, all the buttons were there. Took several tries before I finally got it. I’m gonna add to it more functionality and its a nice way to finally learn React & Node.‘npm start’ gives a whole load of errors. One of them being ‘Couldn’t find preset “es2015” relative to directory’. Can you help me to build a men delusion calculator ?