What is so special about the mongoose library when working with MongoDB
In this article we will explore why mongoose is the preferred library, when working with MongoDB and what makes it popular.
So let’s get started.
Take a look at the following code for MongoDB:
const { MongoClient } = require('mongodb');

const connectionURL = "mongodb://127.0.0.1";
const databaseName = "company";

MongoClient.connect(connectionURL, { useNewUrlParser: true, useUnifiedTopology: true }, (error, client) => {
    if(error) {
        return console.log('error connecting to mongodb');
    }
    const db = client.db(databaseName);

    db.collection('users')
        .insertOne({ name: 'Jonathan', email: 'david@example.com', age: 40  })
        .then(result => console.log(result))
        .catch(error => console.log(error));
});
In the above code, we're using mongodb npm package which provides a pure implementation of interacting with MongoDB database.
In the above code, we are inserting a new document into users collection.
The inserted document has name, email and age fields.
Consider, we have provided a registration form where user enters this information which we are storing in MongoDB.
But there is no guarantee that user enters the valid data while registering. User might enter a string in the age field and number in name field.
If we want to prevent the user from entering bad data, we need to add validation to check for each input field. So you might need to trim the value, convert it to lowercase as user might enter the data in uppercase etc before saving the data into the database.
Imagine, you have added the validation for all fields and in future if there comes a requirement of adding a new field to the collection like salary or phone number, you need to add another validations to handle that. This is cumbersome as you need to verify the validation if it handles all scenarios and modify the validation function to handle new scenario.
Mongoose fixes all of these issues by providing in-built basic validations. It also allows us to write our own validation if required. So making it difficult to mess with the data to be inserted.
Mongoose also requires to declare the type of data each field contains so it’s impossible to enter wrong type of data.
That’s enough about details. Let’s dive into mongoose and understand how to use it.
Install the mongoose library:
npm install mongoose@5.12.13
To start with, we will create a basic code using mongoose.
Create a new file mongoose.js and add the following code:
const mongoose = require('mongoose');

mongoose.Promise = global.Promise;
mongoose.connect("mongodb://127.0.0.1/company");

// create a user model
const User = mongoose.model('User', {
    name: {
        type: String
    },
    email: {
        type: String
    },
    age: {
        type: Number
    }
});

const user = new User({
    name: 'David',
    email: 'david@example.com',
    age: 28
});

user.save() // insert the document
    .then(() => console.log(user))
    .catch(error => console.log(error));
I'm assuming that you already have MongoDB database installed on your machine and the service is already started.
If not, check out this article to install MongoDB database on your local machine.
To execute the above code execute the following command:
node mongoose.js
This will create a new document inside the users collection with the provided data.
Note, even though we have provided the User as model name, mongoose pluralises it and creates a collection with name users.
As you can see in the code, we specify the type of each field in the document while creating the model.
Now, change the age value from number to string and run the code again using node mongoose.js command.
const user = new User({
 name: 'David',
 email: 'david@example.com',
 age: 'John'
});
As we're inserting wrong type of data into the collection, mongoose will throw an error and will not allow you to insert the document.

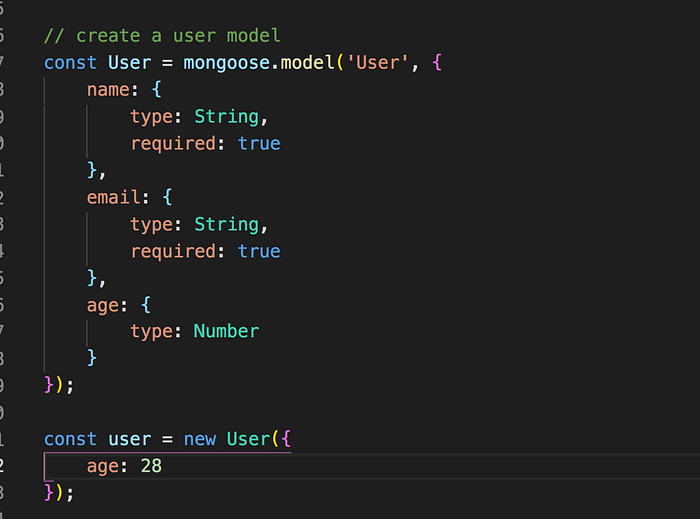
If you want to mark some fields as required fields, you can add required: true while creating the model.

As you can see, we have marked the name and email as required so if we try to save the user without name or email, mongoose will throw an error.

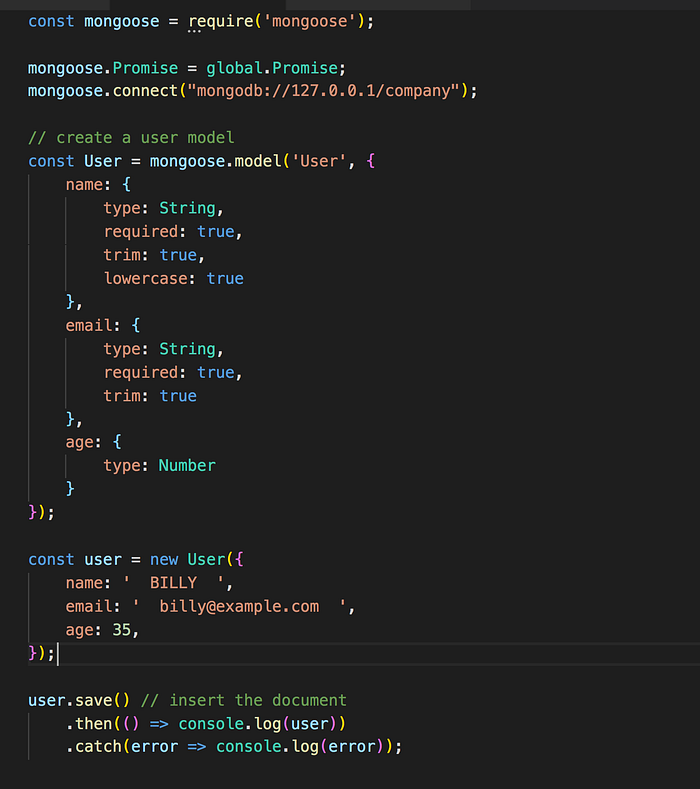
Now suppose, we want to trim the user input and convert to lowercase value while saving the document, we can do that as shown below.

Here, we've added trim: true for name and email field.
When we run the code, we can see that new document is correctly inserted.
Even though, we have provided spaces before and after the name and email, both of them are trimmed and name is converted to lowercase while saving.

So by just adding a single property to model, mongoose makes it so easy to do validation instead of repeating the code for every field.
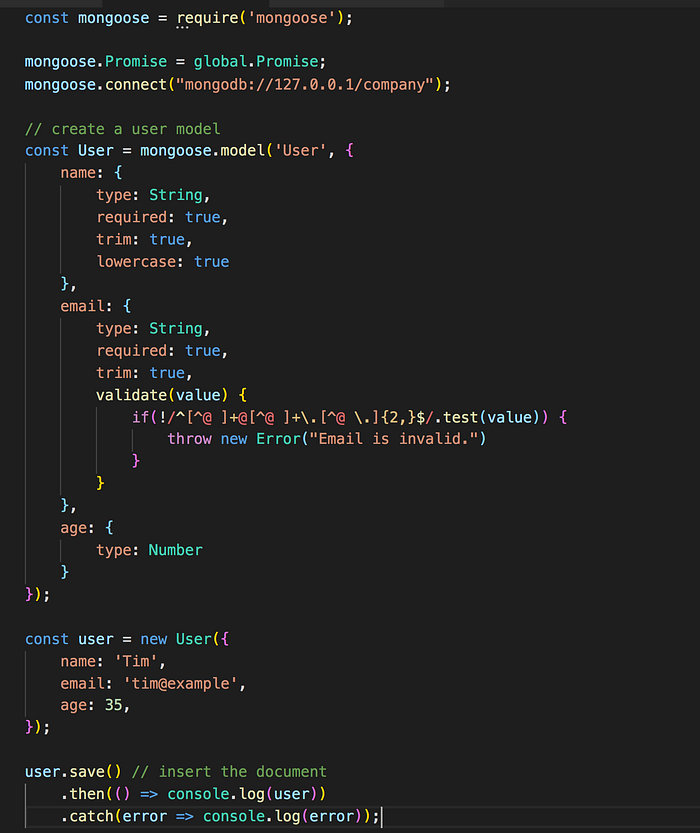
We can add our own validation also for any field by adding a validate method in the model. The value provided by user is passed as the first argument for the validate method.
This method gets called for every data inserted into the collection and if the validation fails, the data will not be inserted to the collection.

Here we are trying to save a user with wrong email address tim@example which will fail because of our added validate method.
So using in-built validations and allowing us to add our own custom validation, mongoose makes working with MongoDB a very easy.
To learn more about mongoose library navigate to this website.
That's is about this article.
Want to stay up to date with regular content regarding JavaScript, React, Node.js? Follow me on LinkedIn.
