Deploying Node App to Heroku
I will be taking us through the process of deploying a Node App to Heroku.
We'll cover two different ways which include:
- Deploying using Github
- Deploying using Command-Line-Interface (CLI)
Deploying using Github
The first order of business is to push your code to Github. I'll be using this repository to deploy.
Sign up on Heroku, if you do not have an account yet with them.
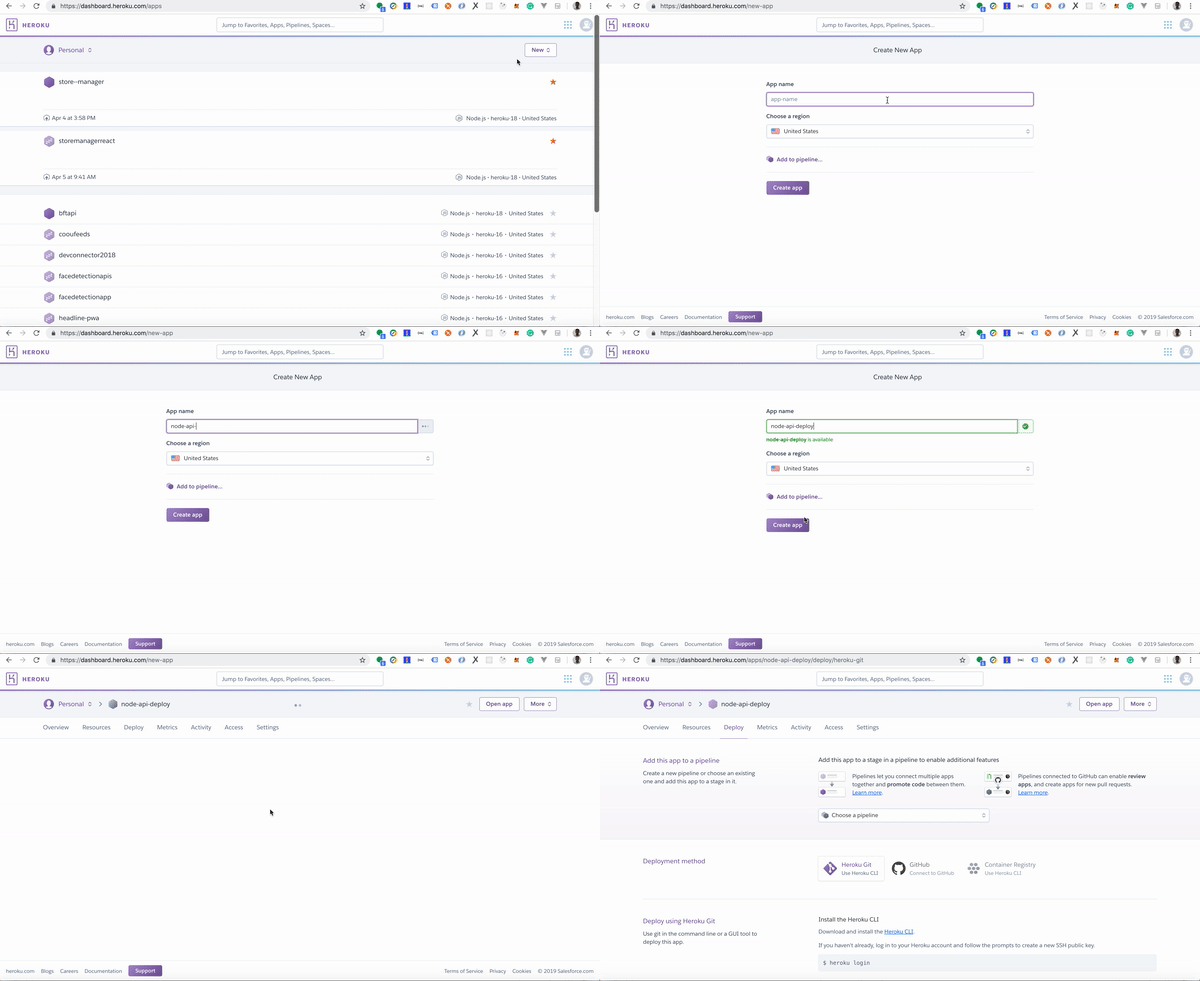
Once you've signed up, follow the steps below to create an application on your dashboard
- Click the New button at the top right of the page, you should see a drop-down with Create new App
- Click on the Create new App
- Provide the name you wish to give your app (Your application name must be lowercase)
- Finally, click on the Create button to create the new app.
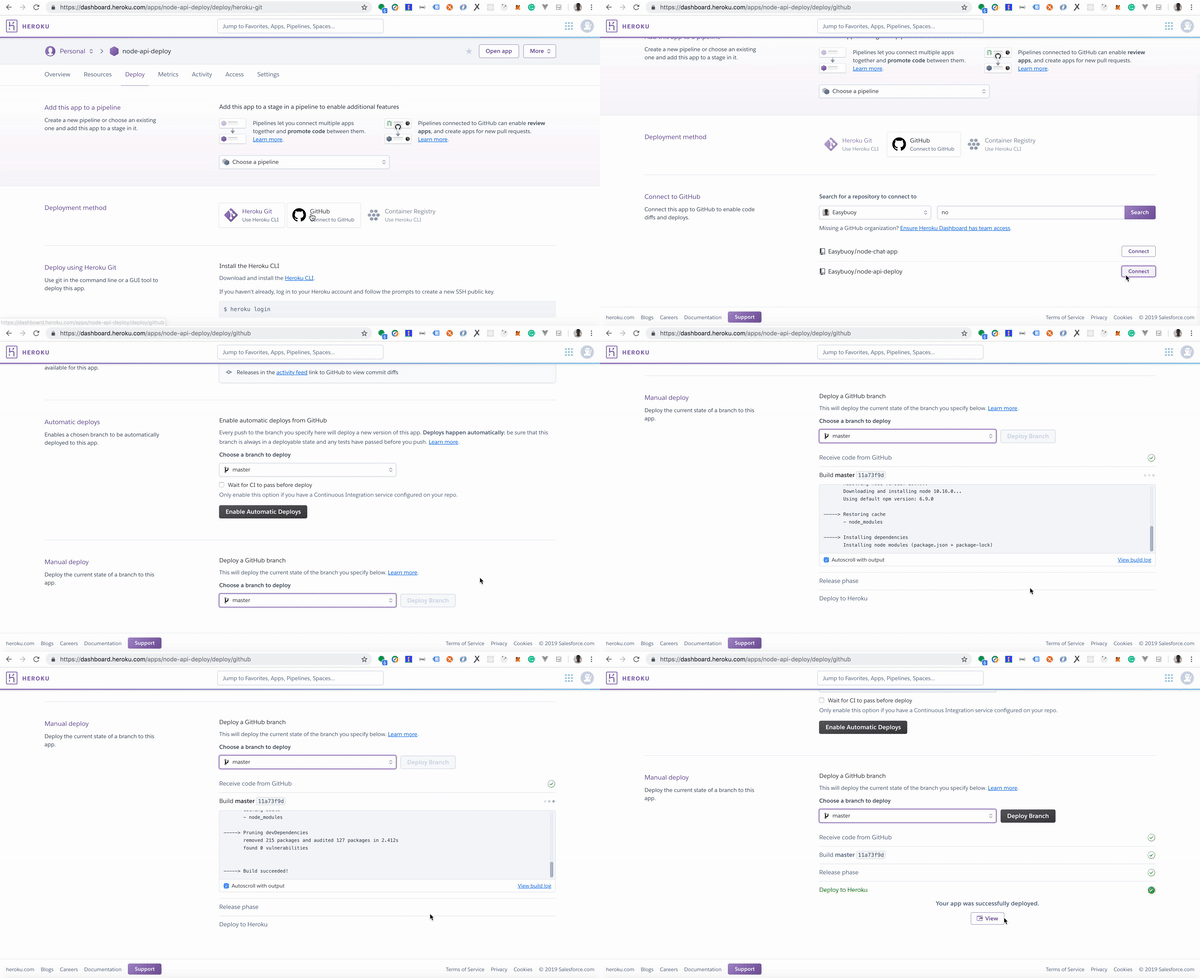
After creating the application, under the deploy section, connect your Github account to Heroku and deploy the application. See the example below.
Once deployed you can go ahead and click on view app, and that's it, we've successfully deployed using Github.
Note: Heroku looks for a
startscript in your package.json file and runs the script to start your application. Example of start script command below.
If you want to use another script to start your application, scroll down to the Procfile section below.
Deploying using CLI
Navigate here to download Heroku-CLI for your operating system.
- Install Heroku-CLI on your local machine.
- Run the command below on your terminal / command-line to login to heroku.
heroku login
- Press any key on the terminal as instructed, and you should be navigated to your browser where you'll see a login page, enter your login details, close the browser and return to your terminal. You should be logged in.
If you want to login via the terminal, without being redirected to the browser you can run the command below
heroku login -i
- Run the command below to create an application on Heroku,
heroku create node-api-deploy
Note:
node-api-deployin the above command is the name of the application we are creating, if we runHeroku createonly, Heroku would generate a random name for our application.
- Add git remote to the application we just created on Heroku
heroku git:remote -a node-api-deploy
- Add files and commit
- Push files
git add .
git commit -m "Deploy"
git push heroku master
Once the push process is finished you can run the command below to view your app on the browser.
heroku open
Environment Variables
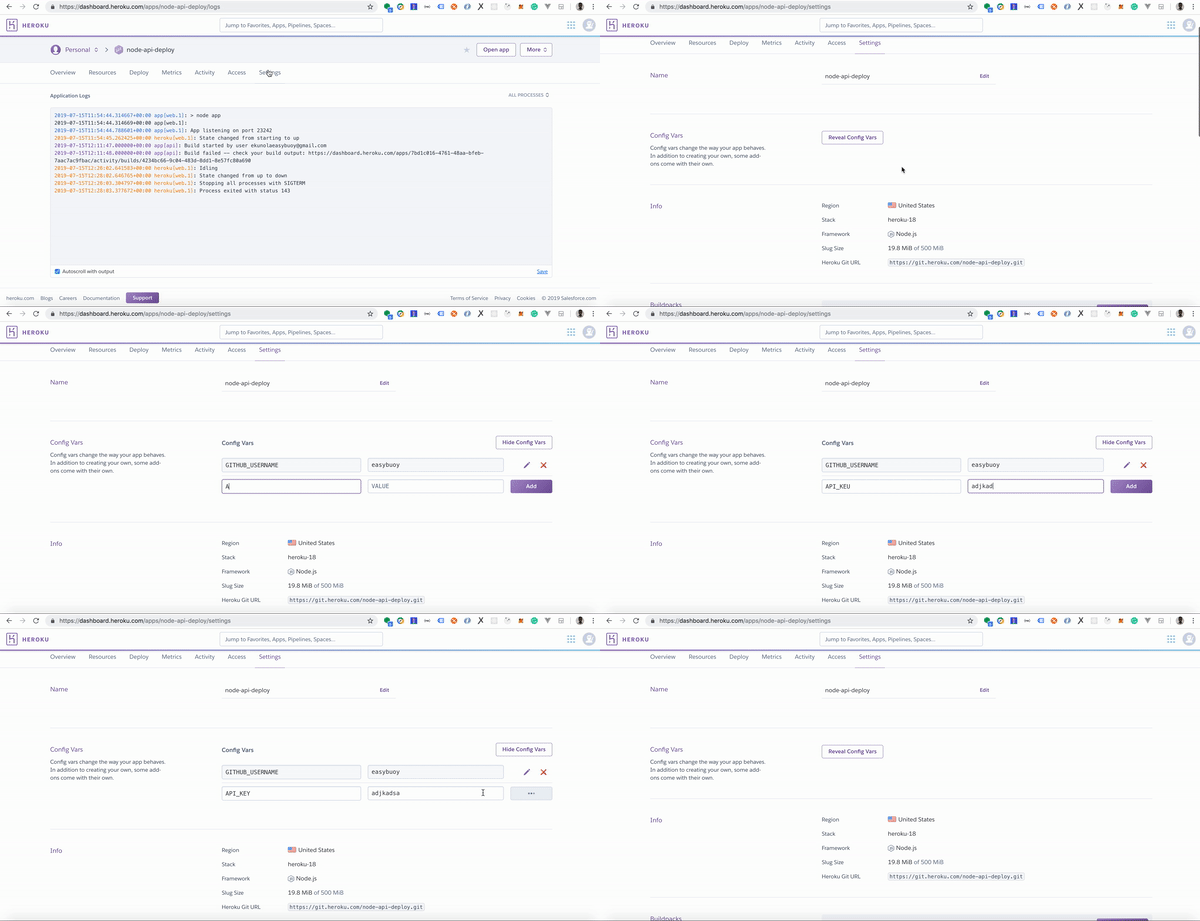
In order to add environment variables on Heroku, we'll use the following steps
- Go to settings
- Click on
reveal-config-vars - add environment variables
- You can follow the example shown in the image below *
To add environment variables with CLI
heroku config:set GITHUB_USERNAME=easybuoy
to get environment variable
heroku config:get GITHUB_USERNAME
Learn more about environment variables here
Heroku logs
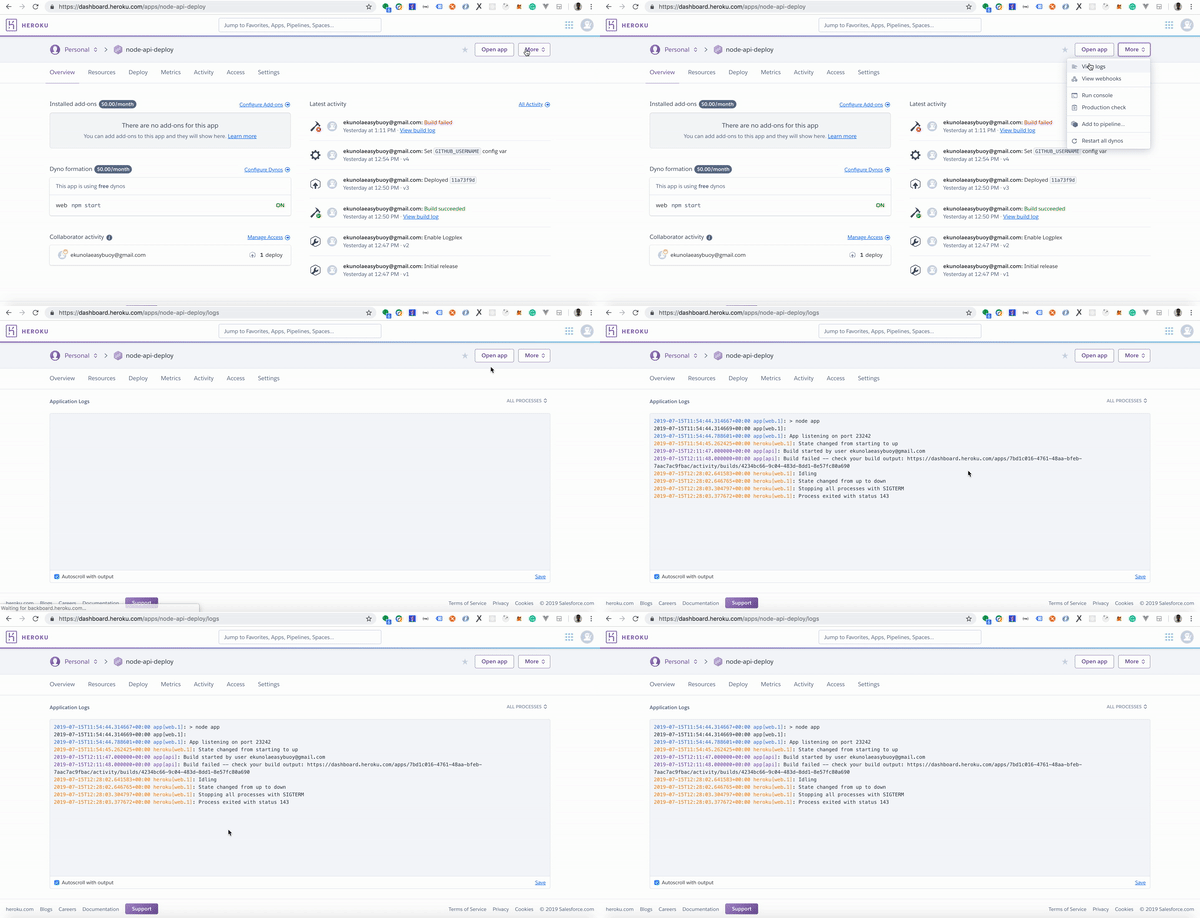
To view the log on Heroku via Heroku's web interface
- Click on settings
- Click on
view logsExample below.
To view the log on Heroku via CLI
- After logging in to the Heroku app, run
heroku logs --tail
Procfile
A Procfile is a file that specifies the commands that are executed by the app on startup.
For example, if you want to run a server script instead of a start script when deploying, you can specify a web command
web: npm run server
Learn more about Heroku Procfile here
Conclusion
In this tutorial, we learned how to deploy a node application using Github and the Command-Line-Interface.
If you have any questions or feedback about this article, feel free to reach out.
Thanks for reading.


I enjoyed this content, keep going.
Hi Ezekiel, can you please help me to rectify the error “The SPAN elements within the “data-cart-info” DIV do not have the required CSS style”
on my code as below:
CSS:
span {
dispay: inline-block;
vertical-align: middle;
}
span.material-icons{
font-size: 150px;
}
HTML:
<div data-cart-info>
<header class=“mdc-typography–headline4”>
<span class=“material-icons”>shopping_cart</span>
<span data-bill></span>
</header>
</div>
Thanks
Try doing this
Hi Ezekiel,
Thanks very much. I tried that but it still brings the same error.
My complete code is here:
<!DOCTYPE html>
<html lang=“en”>
<head>
<meta charset=“UTF-8” />
<meta name=“viewport”
content=“width=device-width, initial-scale=1.0” />
<meta http-equiv=“X-UA-Compatible” content=“ie=edge” />
</head>
<body>
</body>
</html>