Timeline and Keyframe Animations with Anime.js
Originally published at frontendgods.com
In this article we are going to learn the basics of Anime.js and explore how to create animations with keyframes and timelines. Anime.js is a very lightweight JavaScript animation engine and supports all modern browsers. It takes only a couple of lines of JavaScript to create very nice animations. Let's look at an example and explore the basics of Anime.
Animating a Single Property
const myAnimation = anime({
  targets: '#square',
  scale: 2,
  duration: 2000,
  easing: 'linear',
  loop: true,
});
 Animating a single property
In the snippet above, first we call the anime function and we pass it a plain JavaScript object defining our animation. The animation object is pretty self explanatory:
targets: tells Anime how to find the elements that we want to animate. You can either use CSS selectors or simple pass it a DOM Node. In the example above, we are simple using a CSS selector to target an element with the id ofsquare.scale: is one of the properties that we want to animate. Anime will automatically animate the scale transform property of the element from it's initial value to 2. This essentially scales up the element twice its initial size.duration: defines the duration of the animation in milliseconds. In the example above, the duration of the animation is 2000 milliseconds which is equivalent to 2 seconds.easing: the easing functions tells Anime how to interpolate transition values. In the example above we are telling Anime to linearly scale up the square. Anime has a lot of built-in easing functions. You can find them all in the documentation page.loop: using the loop property we can make an animation repeat after it finishes. In the example above we are repeating the animation by setting the loop property to true.
As you can see it's pretty easy to create animations with Anime. Now, let's look at another example and animate multiple properties:
Animating Multiple Properties
const multi = anime({
  targets: '#square',
  scale: 2,
  translateX: ['0', '200px'],
  duration: 2000,
  easing: 'easeInOutSine',
});
 Animating multiple properties
In the example above we are animating both the scale and the transformX CSS properties. Also, we are setting the initial and end values for translateX using an array with two values. The first value is the start value, and the second value is the final transition value. It's also worth mentioning that we are specifying the values as strings with explicit px units. You can use different units, but you would have to use an string to set the value and the unit explicitly, just like the example above. And finally, for the easing function, we are using one of the pre-defined easeInOutSine function. This easing function is very common and results in a very smooth start and end transition.
Now let's see how we can create an animation sequences. Anime provides a very simple API for creating keyframes and sequences. In the next example we are going to use keyframes to create a simple animation.
Animating with Keyframes
As mentioned previously, keyframes allow you to create more complex animations and sequences. But before jumping into keyframes, let's quickly look at relative property values. Relative property values allow you to animate properties relative to their present value. For example, if you have an element that is positioned at 100px, you can use a relative unit to move it another 50px relative to it's current position landing it at 150px:
anime({
  targets: '#box',
  translateX: '+=50px',
});
or reduce the current value by 50px:
anime({
  targets: '#box',
  translateX: '-=50px',
});
Now that we know what relative values are, let's create a simple animation using keyframes and relative property values.
Anime keyframe syntax is pretty straightforward. You specify an array of objects, where each object represent a keyframe:
anime({
  targets: '#square',
  translateX: [
    {
      value: '+=50px',
      duration: 500,
    },
    {
      value: '+=50px',
      duration: 500,
    }
  ],
});
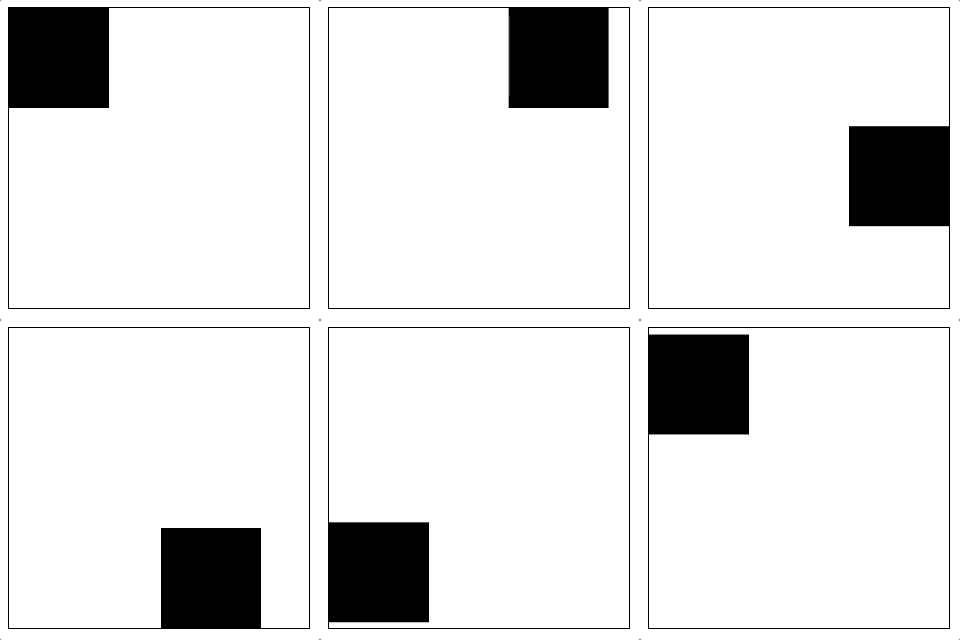
In the snippet above we have defined two keyframes for the the translateX property. In each keyframe we move the box 50px to the right and each keyframe has a duration of 500 milliseconds. Now let's look at an example for changing multiple properties. Below is the outline of the animation that we'll be creating:
- keyframe 1: move the box to the right 200px
- keyframe 2: move the box down 200px
- keyframe 3: move the box to the left 200px
- keyframe 4: move the box up 200px
anime({
  targets: '#square',
  easing: 'easeInOutSine',
  translateX: [
    {
      duration: 1000,
      value: '+=200px',
    },
    {
      duration: 1000,
      value: '+=0',
    },
    {
      duration: 1000,
      value: '-=200px',
    },
    {
      duration: 1000,
      value: '+=0',
    },
  ],
  translateY: [
    {
      duration: 1000,
      value: '+=0',
    },
    {
      duration: 1000,
      value: '-=100px',
    },
    {
      duration: 1000,
      value: '+=0',
    },
    {
      duration: 1000,
      value: '-=200px',
    },
  ],
});
 Animating using keyframes
Notice that we have to specify the duration for each keyframe, otherwise the total duration will not work for each individual keyframe. Also notice that we can greatly simplify the code above by grouping the frames and simply mapping them to Anime keyframes:
const duration = 1000;
const positions = [
  {
    x: '+=200',
    y: '+=0',
  },
  {
    x: '+=0',
    y: '+=200',
  },
  {
    x: '-=200',
    y: '+=0',
  },
  {
    x: '+=0',
    y: '-=200',
  },
];
const boxAnimation = anime({
  targets: '#square',
  easing: 'easeInOutSine',
  loop: true,
  translateX: positions.map(p => ({value: p.x, duration})),
  translateY: positions.map(p => ({value: p.y, duration})),
});
Keyframes are pretty powerful, but let's say you have multiple animations and you want synchronize them. That's where Anime timelines come in. You can sequence and synchronize multiple independent animations using timelines. In the next section we will be exploring Anime timelines in more detail.
Timelines
The Anime timeline has a very simple API:
const tl = anime.timeline({
  /* timeline animation properties */
});
The snippet above creates an empty timeline. You can configure a timeline by passing it a plain JavaScript object that defines the duration, loop, easing, autoplay properties. Note that these properties will apply to every animation unless overridden by each animation:
const tl = anime.timeline({
  loop: true,
  autoplay: true,
  duration: 800,
  easing: 'easeInOutSine',
});
In the snippet above we have created a timeline and we have configured it to play automatically over 800ms and we have configured it to use the easeInOutSine easing function. Note that these settings will apply to each animation that we add, unless we override properties in each animation. Now, we are going to use the add method and add multiple animations to our timeline. Note that we are defining the animation simply by using plain objects, not Anime animation objects:
const timeline = anime.timeline({
  loop: true,
  autoplay: true,
  duration: 800,
  easing: 'easeInOutSine',
});

timeline.add({
  targets: '#square',
  translateX: 200,
})
.add({
  targets: '#circle',
  translateY: [-100, 100],
  easing: 'linear',
  duration: 1000,
});
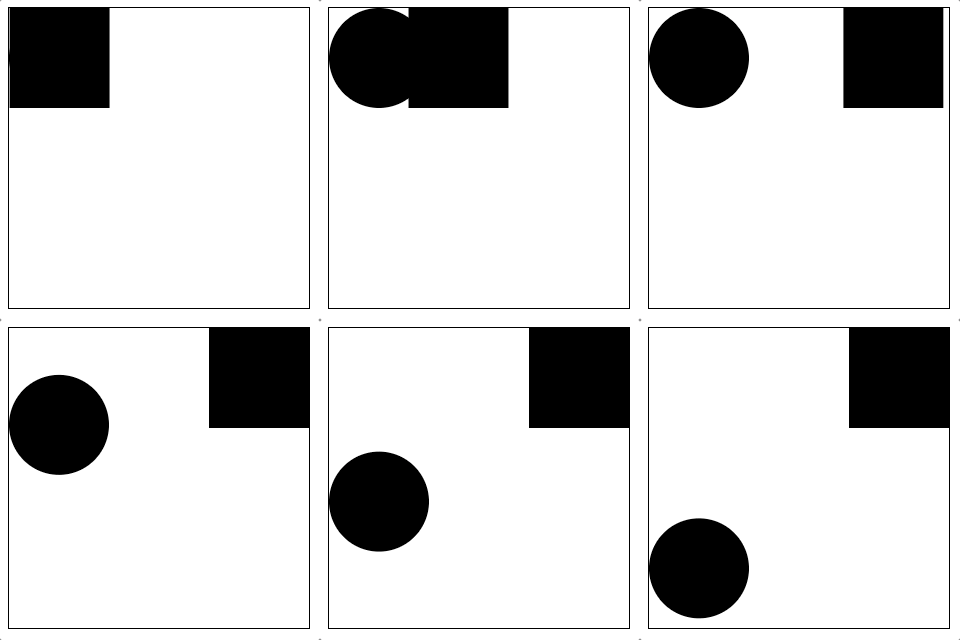
 Simple timeline animation
In the snippet above the first animation is going to follow the timeline's "global" settings. But the second animation overrides the easing, and duration properties. In addition to the properties that have explored so far, we can also define an offset property to specify when each animation should play. There are two main ways to do it, relative or absolute offset values:
Relative Offset
offset: -=100: start this animation 100ms before the previous animation finishes.offset: +=100: start this animation 100ms after the previous animation finishes
Absolute Offset
offset: 100: start at 100ms in the timeline.offset: 200: start at 200ms in the timeline.
Now let's update our example above and make the second animation start 300ms before the first one finishes:
const timeline = anime.timeline({
  loop: true,
  autoplay: true,
  duration: 800,
  easing: 'easeInOutSine',
});

timeline.add({
  targets: '#square',
  translateX: 200,
})
.add({
  targets: '#circle',
  translateY: [-100, 100],
  easing: 'linear',
  duration: 1000,
  offset: '-=300', // <--- added offset.
});
Putting it All Together
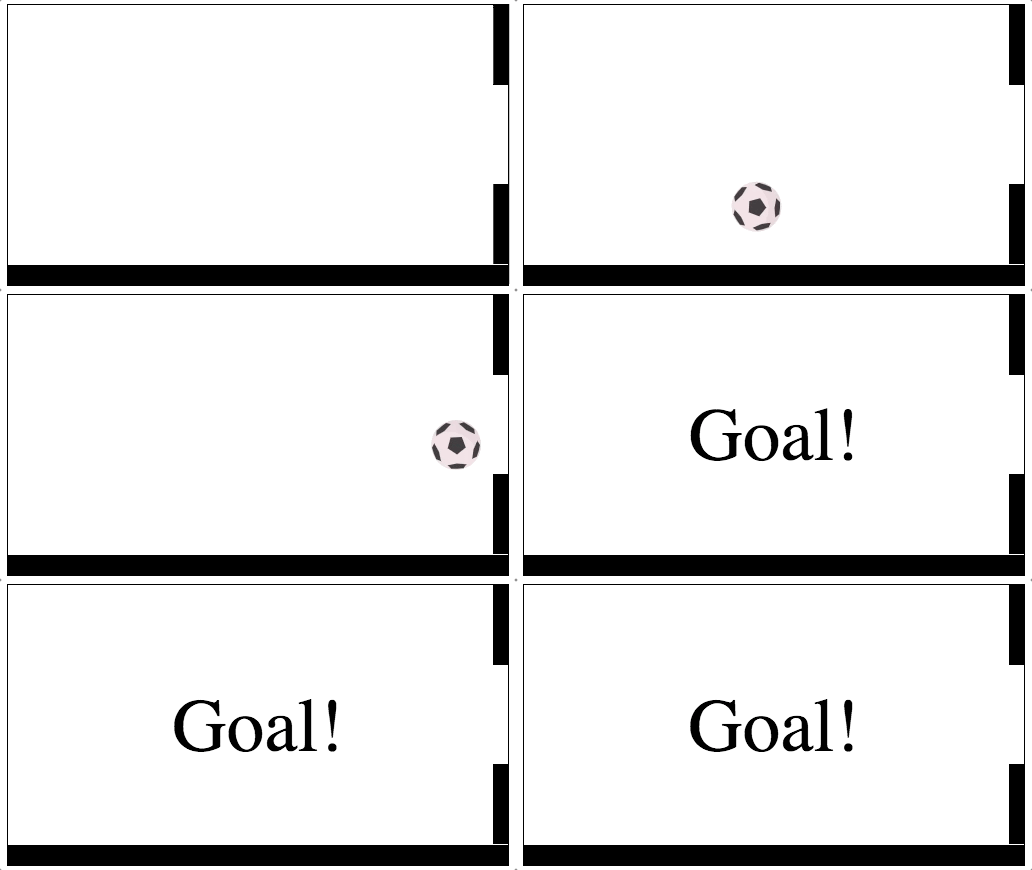
Now let's put what we have learned together and create an animation with keyframes and timelnes. So below is the animation that we are going to be building:
 Soccer animation with timelines
First, we define two animation objects, one for the ball and the other for the goal:
const ballAnimation = {
  targets: '#ball',
  easing: 'linear',
  delay: 200,
  translateX: [
    {
      value: [-50, 500],
      duration: 1400,
    },
  ],
  translateY: [
    {
      value: [-70, 200],
      duration: 700,
    },
    {
      value: '-=130',
      duration: 700
    }
  ],
  rotate: [
    {
      value: '2turn',
      duration: 1400,
    }
  ]
};

const goalAnimation = {
  targets: '#goal',
  scale: {
    value: 1.5,
    duration: 2000,
    elasticity: 800,
  },
  opacity: {
    value: 1,
    duration: 300,
    easing: 'linear',
  },
  offset: '+=100' // <-- Play goal animation 100ms after the previous one.
};
Then we create a timeline and we will set autoplay to false:
const tl = anime.timeline({
  autoplay: false,
});
Now that we have a timeline, we can simply add our two animation objects:
tl.add(ballAnimation)
  .add(goalAnimation);
And finally we call tl.play() to play the animation:

Note that in the goalAnimation above, we add a offset: '+=100' to make it play 100ms after the ball's animation finishes. That's basically how you can create sequences and synchronize multiple independent Anime animations.
