Generating video thumbnails with S3 and Fargate using the CDK
Introduction
This post is inspired from the following write-up which shows how to generate a thumbnail from a video using S3, Lambda and AWS Fargate. We will be creating all these resources using the CDK.
Setup
To follow along, I would suggest cloning the repo and installing the dependencies.
CDK Constructs
Let's start with the resources that we need to create to run this. I'm excluding the imports here to make the snippets smaller, but you can easily find them in the above repo.
First, we will create the VPC in which we want to run our Fargate task.
// lib/thumbnail-creator-stack.ts

const vpc = new ec2.Vpc(this, 'serverless-app', {
  cidr: '10.0.0.0/21',
  natGateways: 0,
  maxAzs: 2,
  enableDnsHostnames: true,
  enableDnsSupport: true,
  subnetConfiguration: [
    {
      cidrMask: 23,
      name: 'public',
      subnetType: ec2.SubnetType.PUBLIC,
    },
    {
      cidrMask: 23,
      name: 'private',
      subnetType: ec2.SubnetType.ISOLATED,
    },
  ],
})
This will create our VPC with 4 subnets (2 Public and 2 Isolated) in each availability zone with the cidr specified. We will be launching our Fargate task in public subnets as it requires internet access.
Now, let's create our ECS Cluster that our Fargate task will run in, and the S3 bucket which will be storing our uploaded videos and the generated thumbnail.
// lib/thumbnail-creator-stack.ts

const cluster = new ecs.Cluster(this, 'FargateCluster', { vpc })

const imagesBucket = new s3.Bucket(this, bucketName, {
  removalPolicy: cdk.RemovalPolicy.DESTROY,
  autoDeleteObjects: true,
})
The first line creates an ECS Cluster and we pass the VPC created above. The next line creates an S3 bucket to store all our videos and thumbnails.
Note: We have specified removalPolicy and autoDeleteObjects to make it easier to delete this stack, but this is not recommended in production as it will cause data loss.
Now come the exciting parts. Let's continue further by creating the task definition and container that will be run when we execute the Fargate task.
// lib/thumbnail-creator-stack.ts

const taskDefinition = new ecs.FargateTaskDefinition(
  this,
  'GenerateThumbnail',
  { memoryLimitMiB: 512, cpu: 256 }
)
imagesBucket.grantReadWrite(taskDefinition.taskRole)

taskDefinition.addContainer('ffmpeg', {
  image: ecs.ContainerImage.fromRegistry(
    'ryands1701/thumbnail-creator:1.0.0'
  ),
  logging: new ecs.AwsLogDriver({
    streamPrefix: 'FargateGenerateThumbnail',
    logRetention: RetentionDays.ONE_WEEK,
  }),
  environment: {
    AWS_REGION: this.region,
    INPUT_VIDEO_FILE_URL: '',
    POSITION_TIME_DURATION: '00:01',
    OUTPUT_THUMBS_FILE_NAME: '',
    OUTPUT_S3_PATH: '',
  },
})
The first line creates a Fargate task definition where we provide the name GenerateThumbnail along with memory and CPU limits which should be enough for generating thumbnails.
Now as we need to read the video from the bucket and write the thumbnail back to the same bucket, we need permissions on that bucket. The line:
imagesBucket.grantReadWrite(taskDefinition.taskRole)
is a construct provided by CDK and is a handy way of saying grant this Task definition's taskRole read and write access to the bucket we created above. This is one of the reasons why I love writing CDK constructs 
Finally we have a snippet that adds a container to the taskDefinition. This contains 3 parts:
-
Image: The image that we will be pulling from DockerHub to create the thumbnail. This is an extension of the
ffmpegimage and I will explain what's inside this image in a later section. -
Logging: This will create a Log group in CloudWatch where we can see the output emitted by our container which is great for debugging.
-
Environment: There are some environment variables the container needs which are as follows:
AWS_REGION: The region that our S3 bucket is in to download the video and upload the thumbnail.INPUT_VIDEO_FILE_URL: This is the URL of our video that will be uploaded by the user.POSITION_TIME_DURATION: The frame of the video atmm:ssrequired to generate the thumbnail.OUTPUT_THUMBS_FILE_NAME: The name of the thumbnail.OUTPUT_S3_PATH: The path of the S3 bucket where the thumbnail will be stored.
Note: Apart from AWS_REGION, all the variables will be provided at runtime by the Lambda function. In our S3 bucket, we will be storing the videos under the video prefix and the thumbnails under the thumbnails prefix.
The next part is creating the Lambda function which the S3 bucket will trigger on object creation.
// lib/thumbnail-creator-stack.ts

const initiateThumbnailGeneration = createLambdaFn(
  this,
  'initiateThumbnailGeneration',
  {
    reservedConcurrentExecutions: 10,
    environment: {
      ECS_CLUSTER_NAME: cluster.clusterName,
      ECS_TASK_DEFINITION: taskDefinition.taskDefinitionArn,
      VPC_SUBNETS: vpc.publicSubnets.map(s => s.subnetId).join(','),
      VPC_SECURITY_GROUP: vpc.vpcDefaultSecurityGroup,
    },
  }
)
This will create the Lambda function using the createLambdaFn helper function that just uses the aws-lambda-nodejs module under the hood. We have specified some environment variables here as well that we need to look at.
ECS_CLUSTER_NAME: We pass the cluster's name that we created above as we need to run the Fargate task in this cluster.ECS_TASK_DEFINITION: The task definition that we created above which we will be running to generate the thumbnail.VPC_SUBNETS: I had mentioned before that we will be running our task in a public subnet as it needs internet access. So here we pass our public subnet id's that we fetch from the VPC created above.VPC_SECURITY_GROUP: We pass the security group that the VPC creates by default as Fargate requires one to run.
Now, this Lambda function needs to run the Fargate task and also needs to pass the role to the task that will be running. For this, we need to add a couple of permissions to the function's role.
// lib/thumbnail-creator-stack.ts

initiateThumbnailGeneration.addToRolePolicy(
  new iam.PolicyStatement({
    effect: iam.Effect.ALLOW,
    actions: ['ecs:RunTask'],
    resources: [taskDefinition.taskDefinitionArn],
  })
)
initiateThumbnailGeneration.addToRolePolicy(
  new iam.PolicyStatement({
    effect: iam.Effect.ALLOW,
    actions: ['iam:Passrole'],
    resources: [
      taskDefinition.taskRole.roleArn,
      taskDefinition.executionRole?.roleArn || '',
    ],
  })
)
The first role allows the function to run the Fargate task that we have created above by passing the taskDefinitionArn to the resources.
The second role is special. This makes sure that when Lambda creates the ECS task and runs it, it has the permission to pass the taskRole and executionRole to the running task. iam:Passrole is a safeguard by AWS that makes sure no resource can pass elevated privileges that it's own.
Note: For those who do not know what iam:Passrole does, here's a great article by Rowan Udell on what the use case for this is and I would highly recommend reading this!
The final snippet is adding a trigger to fire the function we created above whenever a new object is created in S3.
// lib/thumbnail-creator-stack.ts

imagesBucket.addObjectCreatedNotification(
  new s3Notif.LambdaDestination(initiateThumbnailGeneration),
  { prefix: 'videos/', suffix: '.mp4' }
)
We listen for objects being created but with specific constraints. The object should have the videos/ prefix, or as per the S3 console be in the videos folder and it should have an .mp4 extension.
Note: It's needed to have a prefix when you are going to add something back to the same bucket or else the Lambda will trigger infinitely! So the best way is listening for objects in a specific prefix and creating objects in another prefix if working in the same bucket.
Lambda function implementation
Now as we're done with the constructs, let's look at what the Lambda function has. This is available in the functions directory.
First, we define our environment variables required.
// functions/config.ts

export const envs = {
  AWS_REGION: process.env.AWS_REGION,
  ECS_CLUSTER_NAME: process.env.ECS_CLUSTER_NAME,
  ECS_TASK_DEFINITION: process.env.ECS_TASK_DEFINITION,
  VPC_SUBNETS: process.env.VPC_SUBNETS?.split(','),
  VPC_SECURITY_GROUP: process.env.VPC_SECURITY_GROUP,
}
These are all the environment variables needed that we defined while constructing our Lambda function and which we will be passing to the Fargate task.
Next, let's move on to where the function is defined.
// functions/initiateThumbnailGeneration.ts

const ecs = new ECS()

export const handler = async (event: S3Event) => {
  let { bucket, object } = event.Records[0].s3
  let videoURL = `s3://${bucket.name}/${object.key}`
  let thumbnailName = `${object.key.replace('videos/', '')}.png`
  let framePosition = '01:32'

  await generateThumbnail({
    videoURL,
    thumbnailName,
    framePosition,
    bucketName: bucket.name,
  })
}
We initialise the ECS instance and this is our main handler where we get the event (S3Event) in which we get all the details of the uploaded object or video in our case.
In this handler, we extract all the values needed like the bucket name, object key and send them all to the generateThumbnail method which we will view below.
Note: I have provided a static frame position here, but to make this dynamic, it can come from the file name or an external API.
// functions/initiateThumbnailGeneration.ts

const generateThumbnail = async ({
  videoURL,
  thumbnailName,
  framePosition = '00:01',
  bucketName,
}: GenerateThumbnail) => {
  let params: ECS.RunTaskRequest = {
    taskDefinition: envs.ECS_TASK_DEFINITION,
    cluster: envs.ECS_CLUSTER_NAME,
    count: 1,
    networkConfiguration: {
      awsvpcConfiguration: {
        assignPublicIp: 'ENABLED',
        subnets: envs.VPC_SUBNETS,
        securityGroups: [envs.VPC_SECURITY_GROUP],
      },
    },
    launchType: 'FARGATE',
    overrides: {
      containerOverrides: [
        {
          name: 'ffmpeg',
          environment: [
            { name: 'AWS_REGION', value: envs.AWS_REGION },
            { name: 'INPUT_VIDEO_FILE_URL', value: videoURL },
            { name: 'OUTPUT_THUMBS_FILE_NAME', value: thumbnailName },
            { name: 'POSITION_TIME_DURATION', value: framePosition },
            { name: 'OUTPUT_S3_PATH', value: `${bucketName}/thumbnails` },
          ],
        },
      ],
    },
  }
  try {
    let data = await ecs.runTask(params).promise()
    console.log(
      `ECS Task ${params.taskDefinition} started: ${JSON.stringify(
        data.tasks,
        null,
        2
      )}`
    )
  } catch (error) {
    console.error(
      `Error processing ECS Task ${params.taskDefinition}: ${error}`
    )
  }
}
The first block in this function defines the parameters to run the ECS task. The gist of this is that we want to create run just a single instance of this Fargate task with the given task definition inside the cluster that runs the VPC and public subnets obtained from environment variables.
We also add something called containerOverrides where we pass the container name that needs the environment variables. In these variables, we pass all the values we constructed in the Lambda handler above like the uploaded videoURL, the new thumbnailName and framePosition for which we want the thumbnail.
Finally, in the try/catch block, we run our ECS task via ecs.runTask and log the success and error states which will be visible in CloudWatch.
Dockerfile creation
The Dockerfile creation is quite simple. You can either create your own and deploy it on DockerHub or use the one I created available here.
We have two files here that will constitute our image. Let's have a look at the Dockerfile first.
# docker/Dockerfile

FROM jrottenberg/ffmpeg:4.3-ubuntu

RUN apt-get update && \
  apt-get install -y curl unzip && \
  curl "https://awscli.amazonaws.com/awscli-exe-linux-x86_64.zip" -o "awscliv2.zip"

RUN unzip awscliv2.zip && \
  ./aws/install && \
  aws --version

WORKDIR /files

COPY ./copy_thumbs.sh /files

ENTRYPOINT ./copy_thumbs.sh
What we do here is use the jrottenberg/ffmpeg image and install the AWS CLI. This is required to download the video and upload the thumbnail that ffmpeg will process.
The last two lines are important here. We copy a certain copy_thumbs.sh file and add it to our ENTRYPOINT that will be executed when our container is run. Let's look at this file now.
# docker/copy_thumbs.sh

#!/bin/bash

echo "Downloading ${INPUT_VIDEO_FILE_URL}..."
aws s3 cp ${INPUT_VIDEO_FILE_URL} video.mp4
ffmpeg -i video.mp4 -ss ${POSITION_TIME_DURATION} -vframes 1 -vcodec png -an -y ${OUTPUT_THUMBS_FILE_NAME}

echo "Copying ${OUTPUT_THUMBS_FILE_NAME} to S3 at ${OUTPUT_S3_PATH}/${OUTPUT_THUMBS_FILE_NAME}..."
aws s3 cp ./${OUTPUT_THUMBS_FILE_NAME} s3://${OUTPUT_S3_PATH}/${OUTPUT_THUMBS_FILE_NAME} --region ${AWS_REGION}
This file firstly downloads the provided file URL as video.mp4. Then we run the ffmpeg binary to create a thumbnail from the video on the frame position we specified and outputs it to the name we specified in OUTPUT_THUMBS_FILE_NAME. Finally, we upload the thumbnail to S3 in our thumbnails prefix/folder and this is again done by the CLI command aws s3 cp.
Deploying the application
As we're done with the constructs and functionality, let's deploy this CDK project and test it out. we need to run yarn cdk deploy or yarn cdk deploy --profile profileName if you are using a different AWS profile.
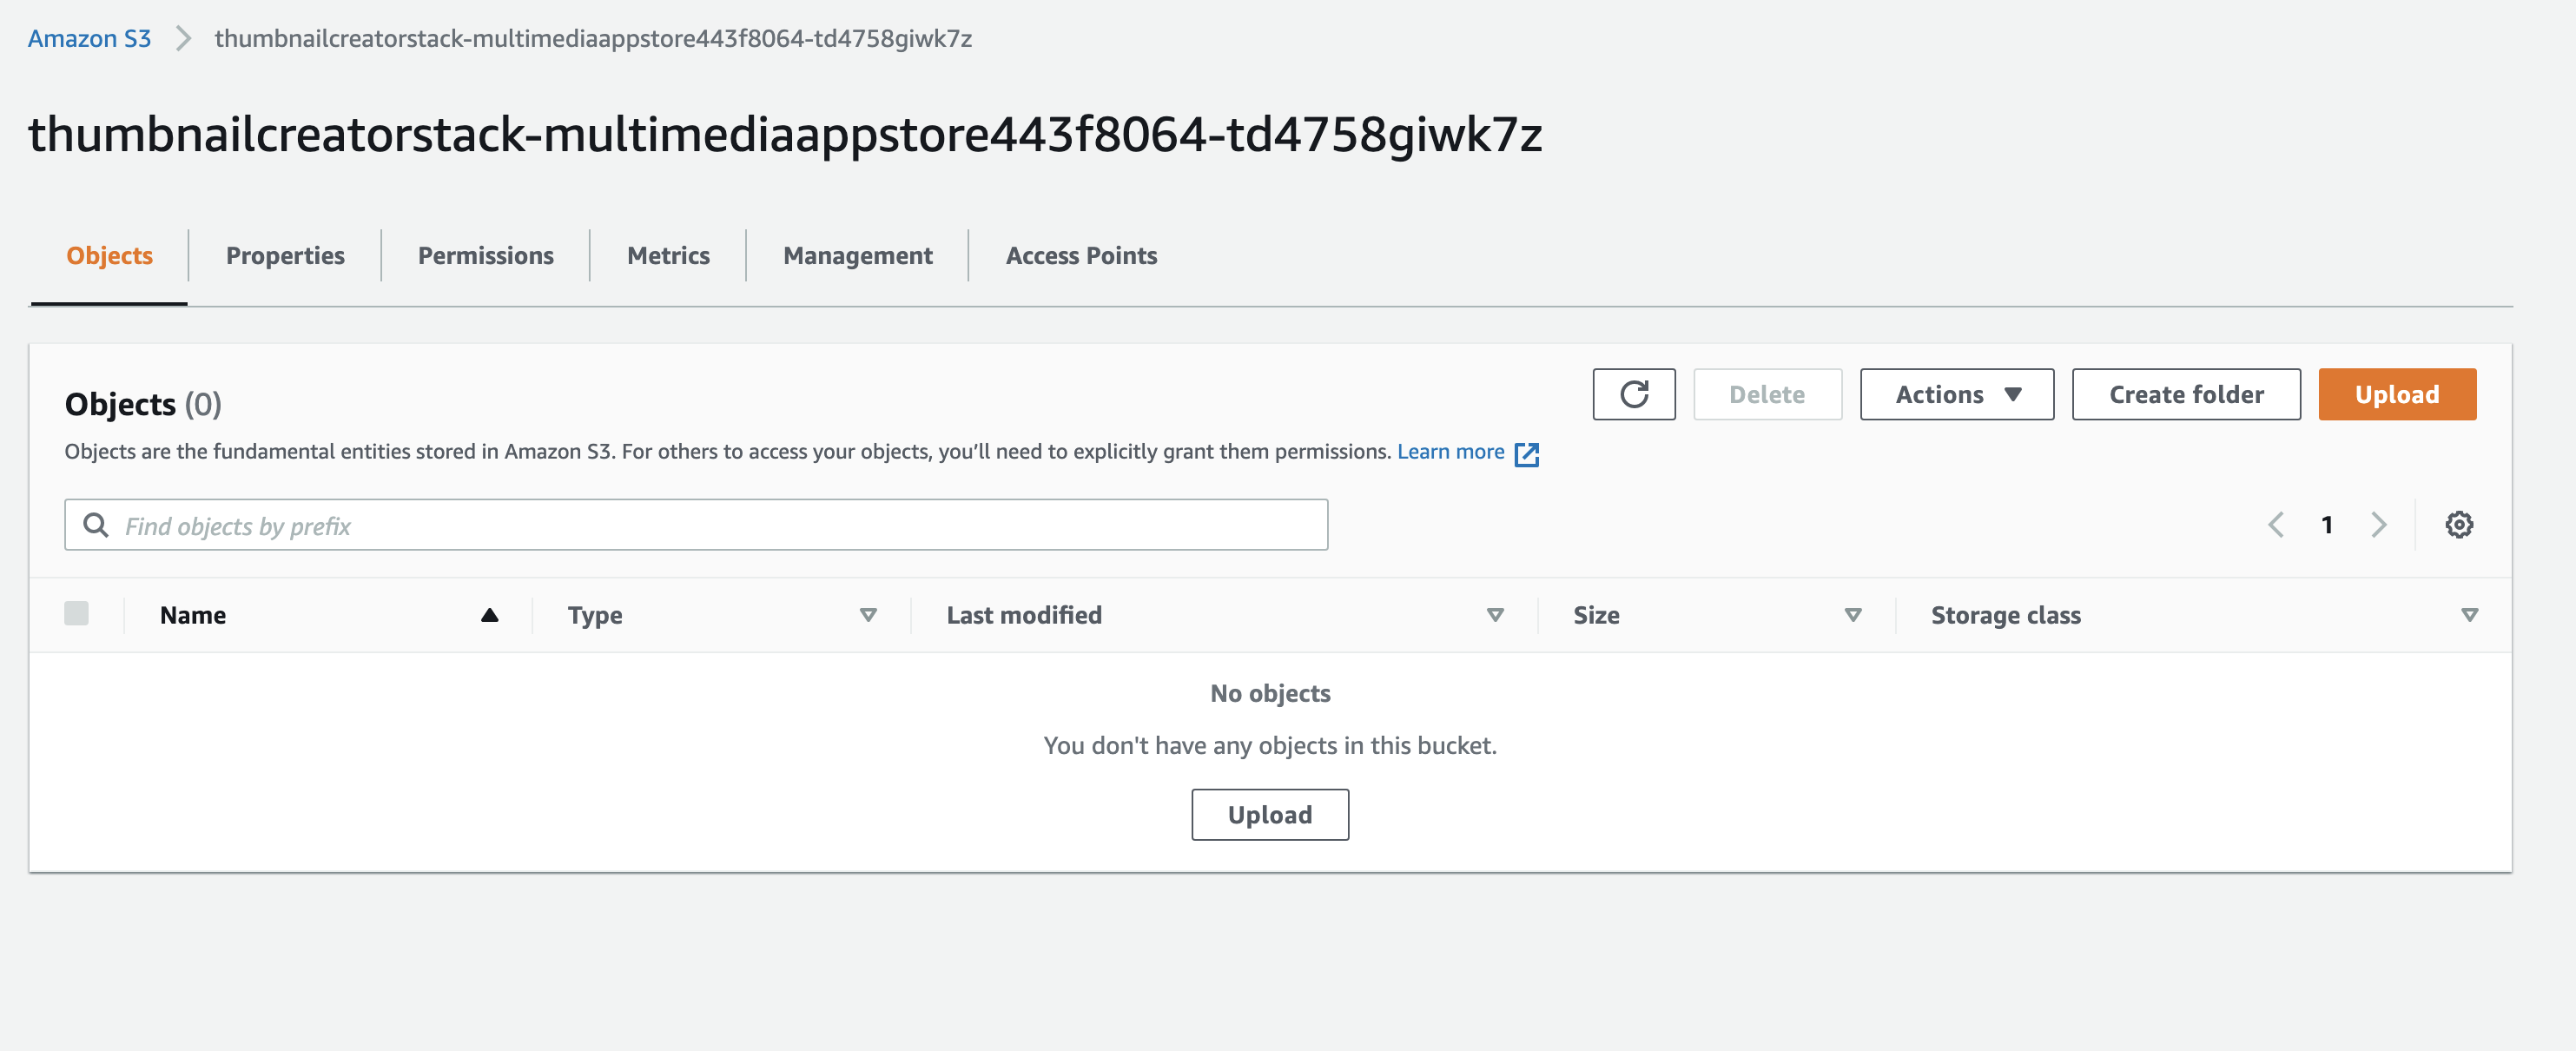
Now we have deployed the application, you should be able to see a bucket created like this. The name would be different in your environment.

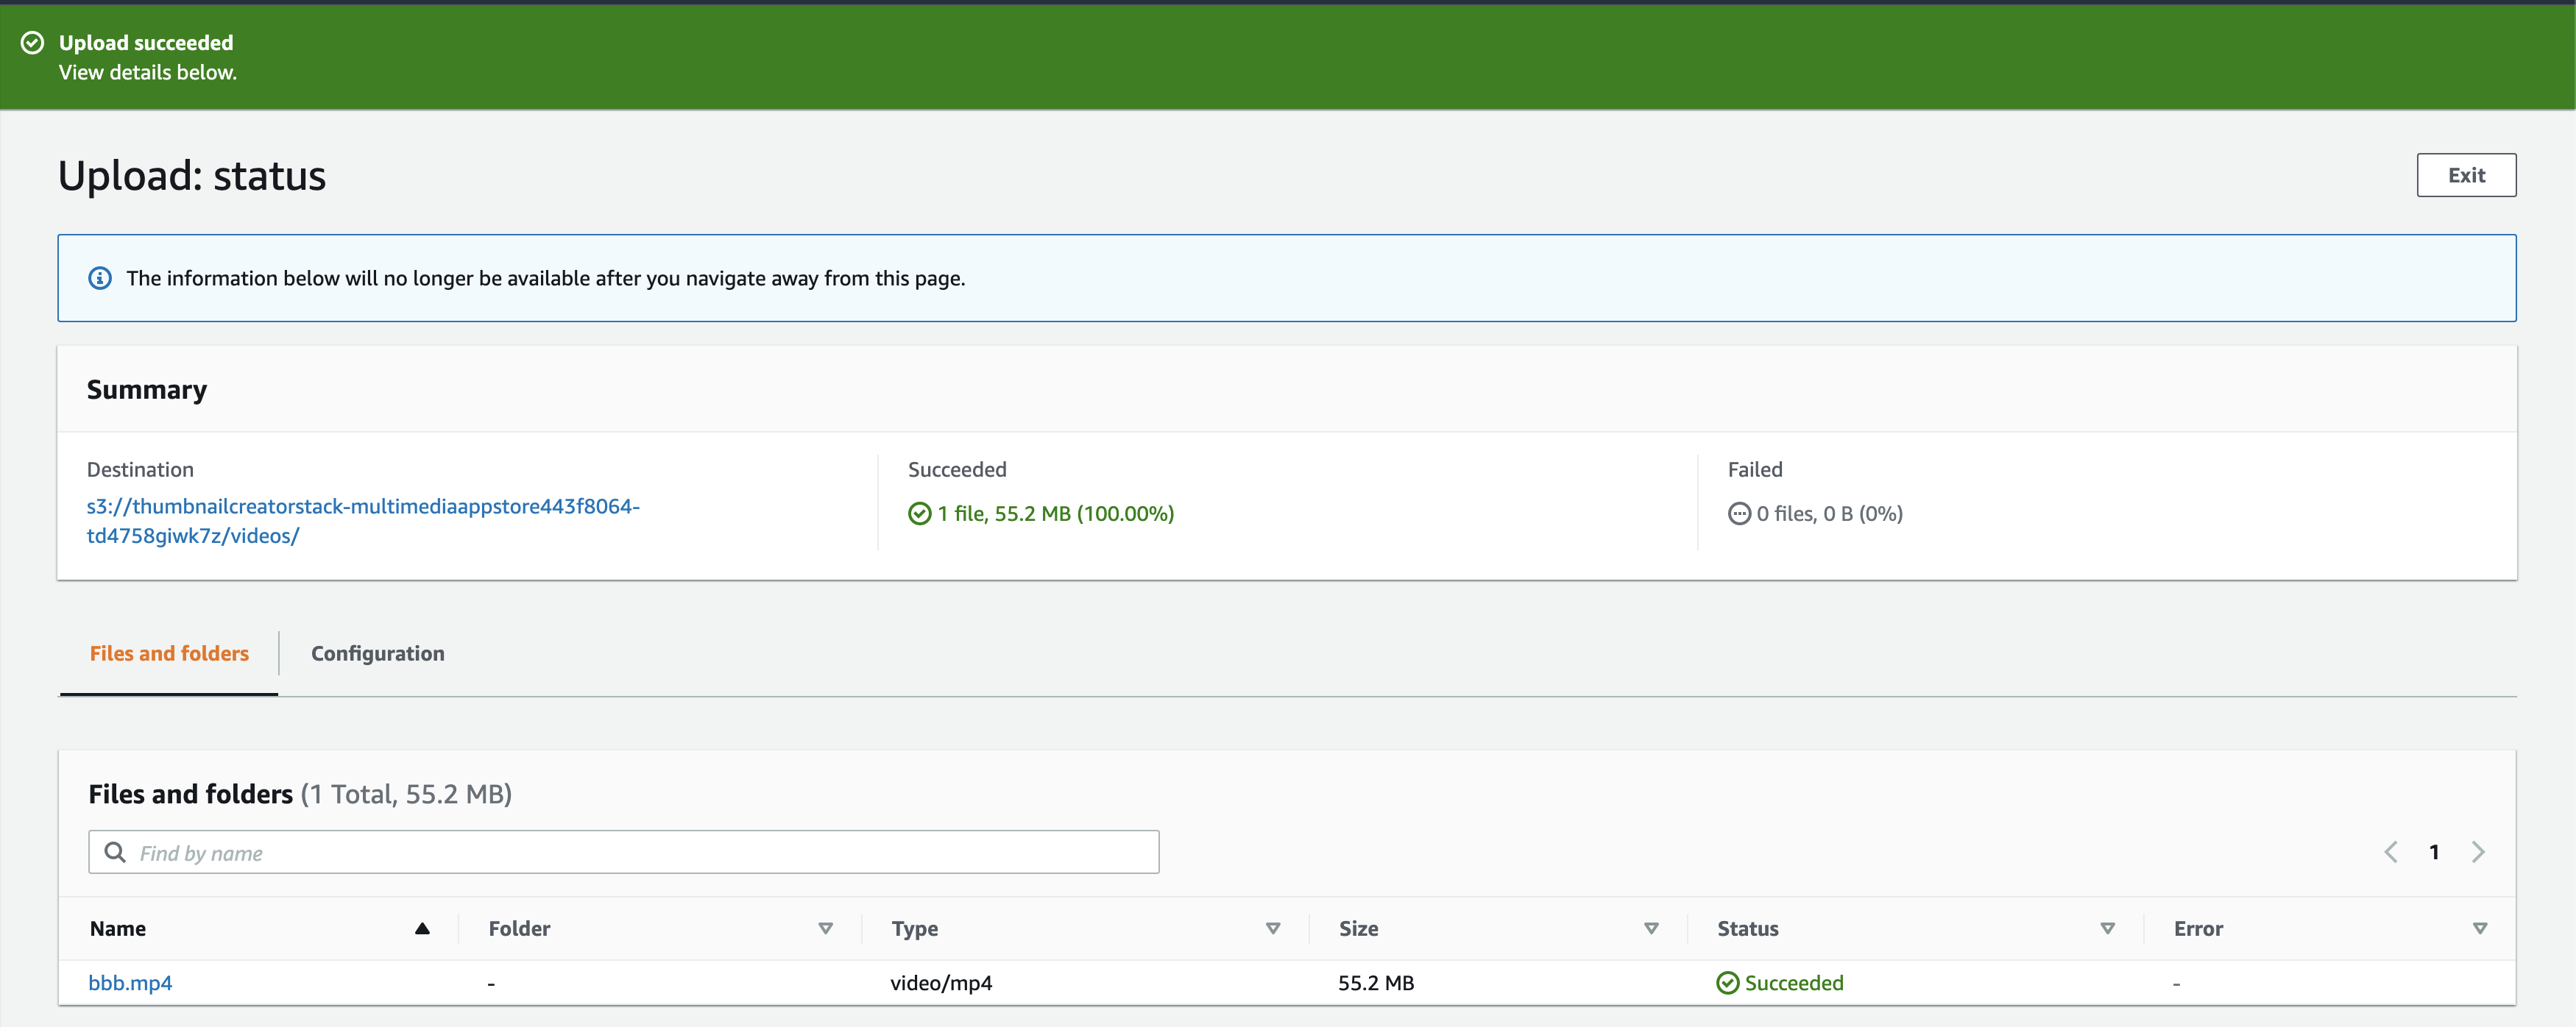
Let's create the videos folder and upload a video to check if our thumbnail generation task is working. I have uploaded quite a famous video used widely for testing that you can use too.
After this upload is done, you should see a success message from S3 in this way:

This should kick off our Lambda function, so let's check the CloudWatch log group for our Lambda function.
On inspecting the logs, we see that the ECS task has run successfully.

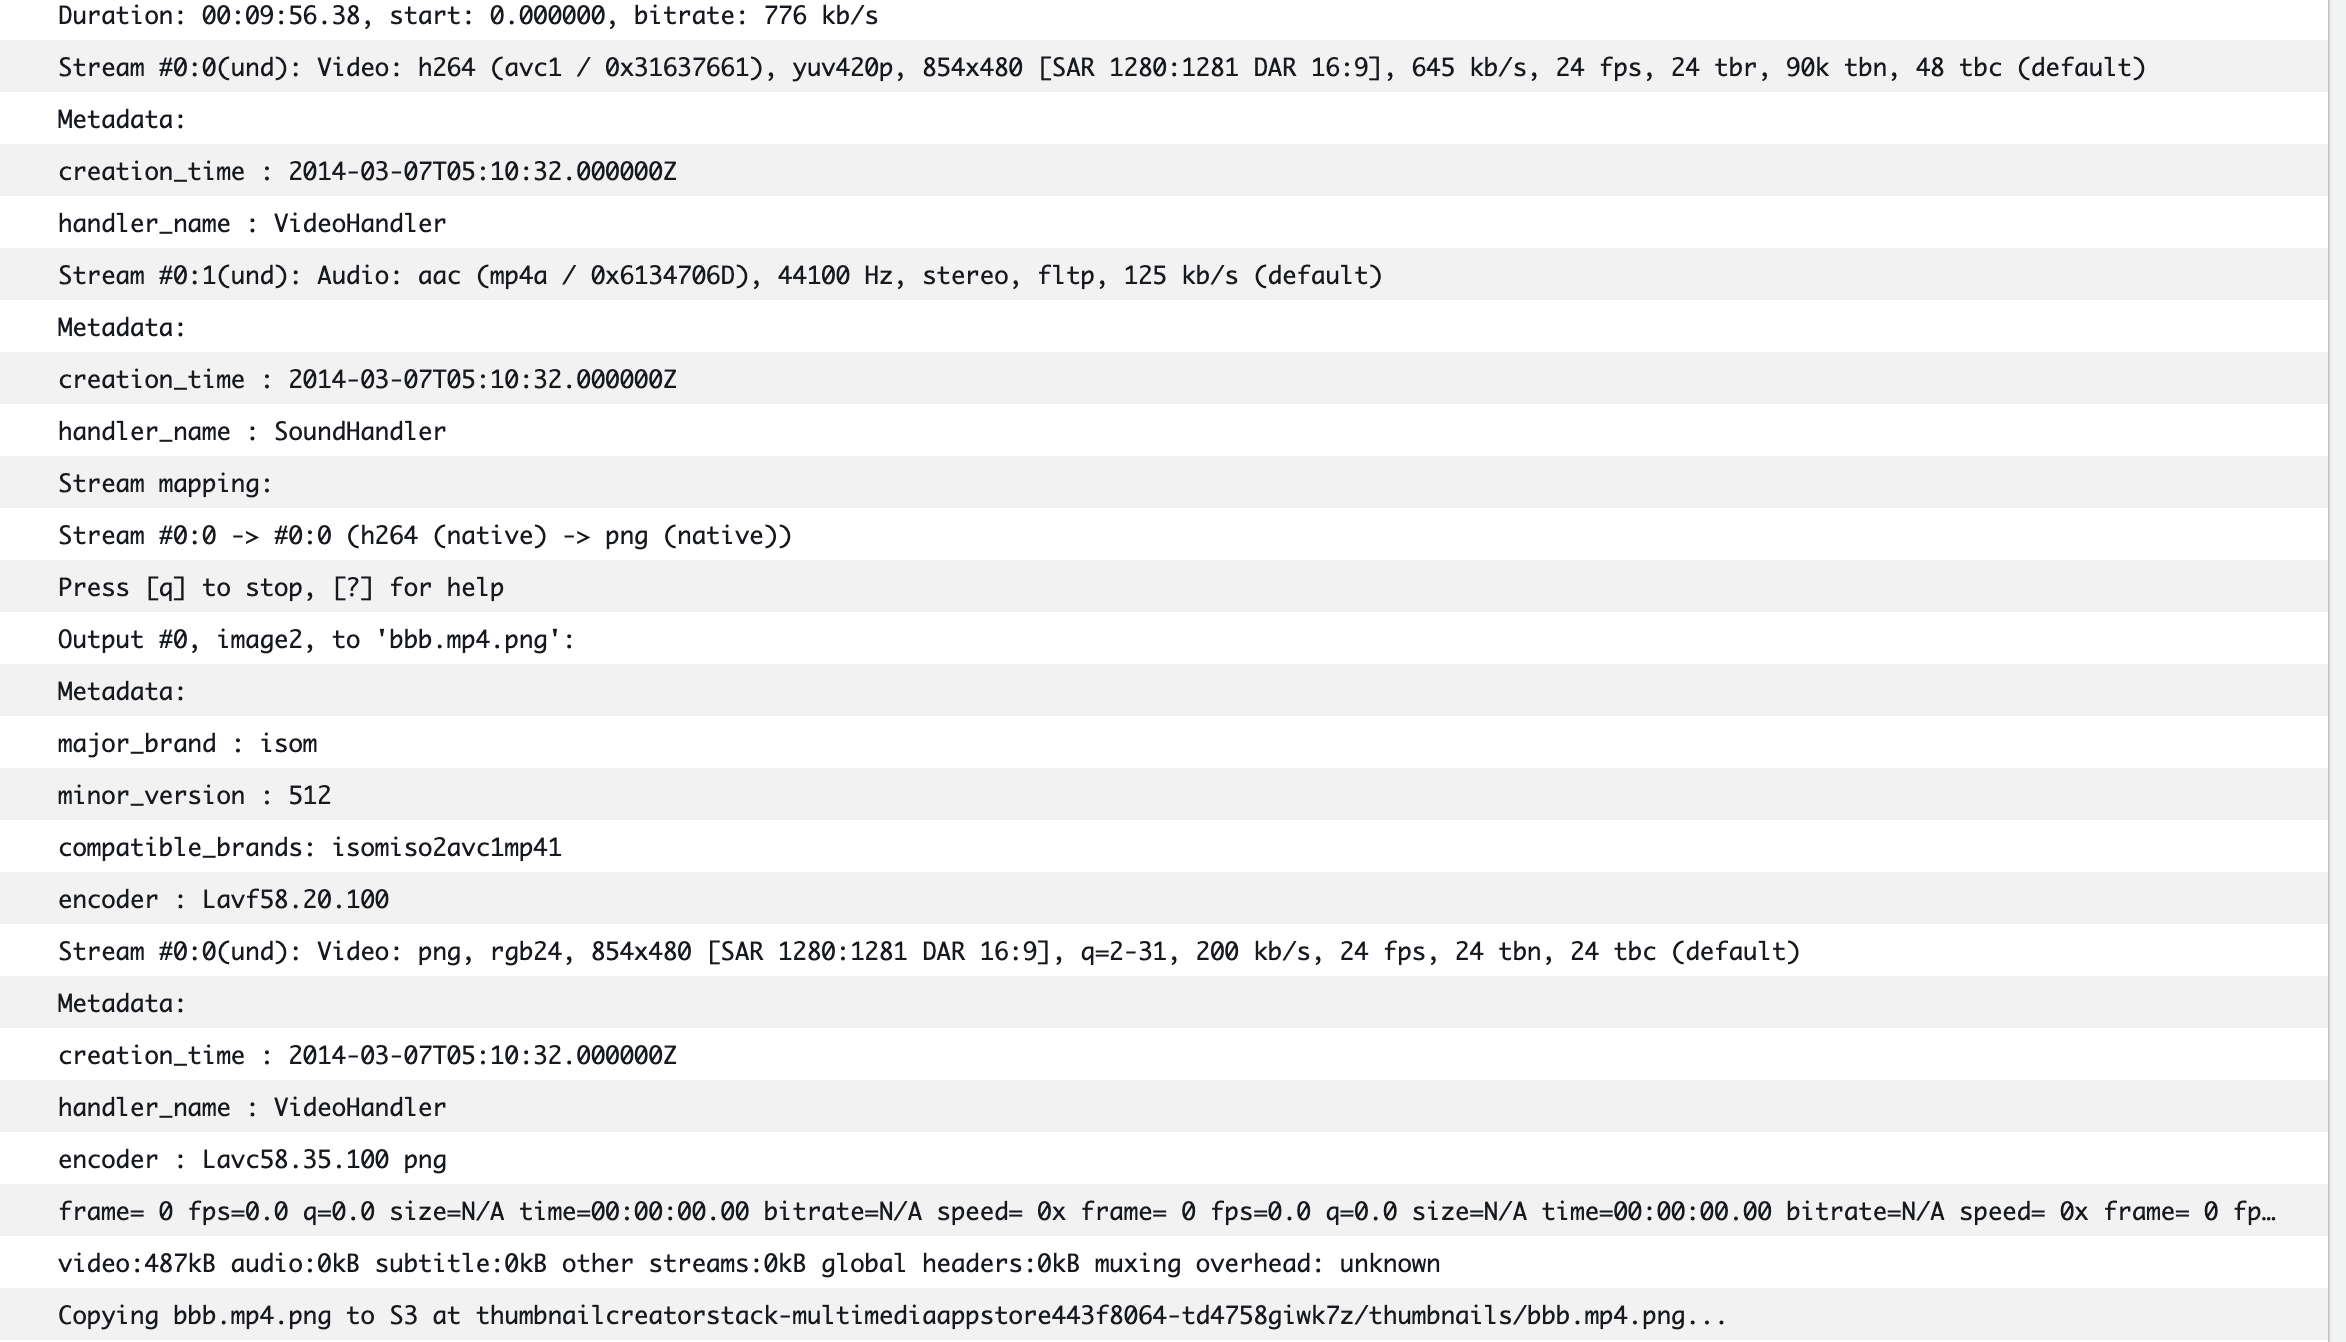
Let's also check our Fargate task logs to confirm if the thumbnail has been created.

This means that our task has completed successfully! Finally let's check our S3 bucket and confirm. Voila! The thumbnail has been generated successfully and the output is exactly at the provided frame 


So this is how we can generate thumbnails for our video in a truly serverless fashion by using a combination of Lambda and Fargate.
Note: Do not forget to delete this stack after completion by running yarn cdk destroy or yarn cdk destroy --profile profileName if you're using a custom profile.
Again the link to the repo if you haven't checked it out yet 
I hope you liked this post, so it would be great if you could like, share, and also provide some feedback if I have missed something. Thanks for reading!
