BYODex — Bring Your Own Decentralised Exchange
Introduction
What is BYODex
BYODex is a tiny, decentralised token exchange built on top of a smart contract. It is not an exchange as you know it, but more like a controlled DApps environment in terms of the price policy. BYODex is decentralised in a sense that it runs on top of Ethereum network spread out worldwide, and not on a particular server. It defines project owner as market maker and allows exchange users to buy and sell tokens directly from their wallets without the need to first deposit tokens, trust a third party or pay any exchange fees.
Why would you need it
- Your project doesn’t want or can’t list on other exchanges
- Your project is interested in doing their ICO/STO/token sale (by minting the tokens first and transferring them into the dex for sale)
- Your project would like to influence the token market price (by market making)
- Your project has to enforce some additional form of trade/traders validation (KYC/AML/STO)
- Your project is offering a controlled way for buying back the tokens
Architecture
The backbone of this dex is a smart contract: BYODex.sol
Once deployed, the dex can have multiple admins who can pause the trading or update the token rates. For this demo, we are using a standard ERC20 token which we named Sample Token and it can be traded for ether.
The UI of this project is very clean and simple, built with Bootstrap and Javascript. Despite it’s being good enough for this demo but we would suggest to go for React and Drizzle for a production project for additional features that those tools provide.
Exchange Demo
If you want to give it a try, head to http://byodex.com with a web3 enabled browser (e.g. Metamask). If you don’t have a web3 instance present you should see this popup:
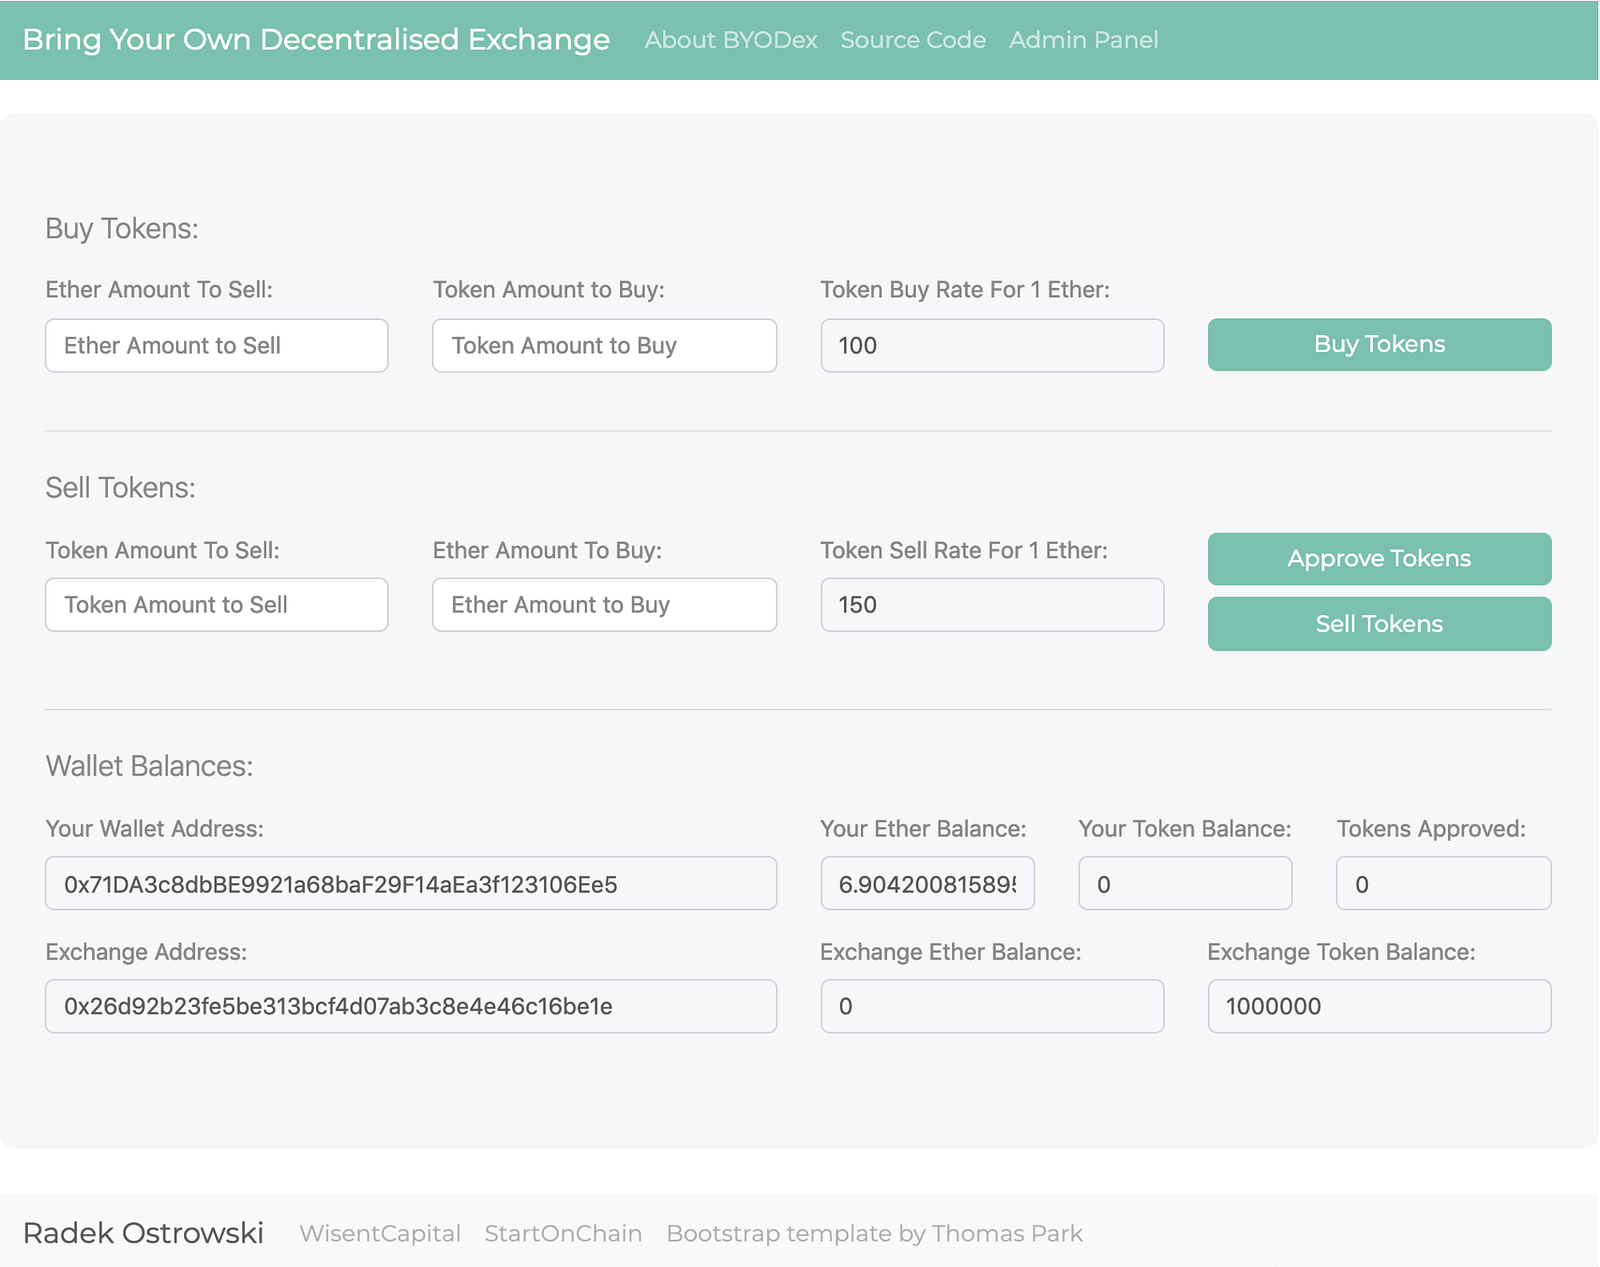
If it’s all set and you switched to Rinkeby test network, what you should see is … a main BYODex dashboard, boom!
This DApp allows for trading of a given token. You can also see that the rate for buying and selling has been set by the admin to 100 and 150 tokens for 1 ether correspondingly. This dashboard also shows the current ether and token balance of your connected wallet as well as the one of the dex. Note that at this point, dex is holding 1,000,000 tokens and zero ether. Let’s try to buy 100 tokens for 1 ether as shown below:
The Metamask shows that the transaction has been processed as presented below:
We can see that our new token balance has changed to 100 and we are 1 ether poorer. On the other hand, the dex has now got 1 ether and 999,900 tokens.
Now, let’s try to sell some of the tokens back. If the token contract you are using has approveAndCall functionality, the sell process could happen in one transaction. Many of the tokens, however don’t have this function so we first have to enable the dex to take the tokens from our wallet (approve) and then sell them in a subsequent transaction. The process of approving 75 tokens is shown on the following screenshot:
And here’s a popup from Metamask to confirm the approval:
Once the tokens have been approved we can see the approved balance showing 75:
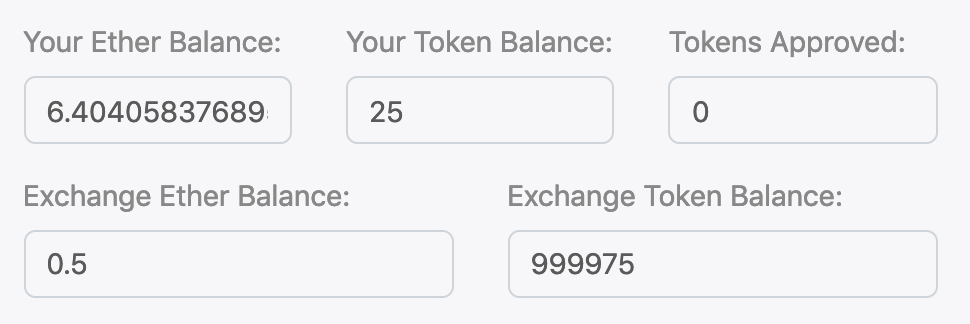
And finally, after selling, our token balance will shrink to 25 but we will get 0.5 ether back. Tokens approved is 0 again. The dex’s ether and token balance will update correspondingly as shown below:
So that would be it, a basic way for users to buy and sell your tokens.
Admin Dashboard
Here we have a very simple example of an Admin dashboard. As you can see below, it allows for pausing the trading and updating the rates:
If the connected Ethereum address is not the one of the admins, it will get a polite note to go back to the main dex page:
Now, let’s try and pause the trading. After hitting the pause button as admin and waiting for the transaction to be confirmed we should see the below. Note, that all the transactions of users trying to buy or sell will now fail. It would be also possible to pause only one side: buy or sell.
We can also update the rates, for example let’s change buy rate to 140 tokens per 1 ether:
Our new rate is now updated, as visible on both admin and main dex’s views:
Where to go from here
This demo project could be extended into one which trades any ERC20 to ERC20 tokens. This could be particularly of interest if your project needs a trading pair with a stable coin like DAI, TUSD, USDC etc.
Another possible use case is if your project requires a simple way to control who can buy and sell on this dex. This could be achieved with an on-chain whitelist or an off-chain message signing.
For an even more granular control, like the exact amounts and the specific wallets that can trade, most likely message signing is the best way to go. How this could look like in practice: any user would have to paste an additional message they get from the project admin (into a new text field on the dashboard) whenever they are trading. This would get verified by the smart contract and fail any invalid trade request.
Summary
This short article should give you a good idea of how BYODex works. We believe that it can be of use to many projects out there, that’s why we decided to open source it, despite some incomplete UI features at this point in time (no automatic refresh, missing token/ether withdrawal buttons etc).
If you feel that this project could be extended and help your organisation in any way, feel free to tell us about it or contact us if you require any blockchain development services.


