How To Get Page Source In Selenium Using Python?
Retrieving the page source of a website under scrutiny is a day-to-day task for most test automation engineers. Analysis of the page source helps eliminate bugs identified during regular website UI testing, functional testing, or security testing drills. In an extensively complex application testing process, automation test scripts can be written in a way that if errors are detected in the program, then it automatically.
- saves that particular page’s source code.
- notifies the person responsible for the URL of the page.
- extracts the HTML source of a specific element or code-block and delegates it to responsible authorities if the error has occurred in one particular independent HTML WebElement or code block.
This is an easy way to trace, fix logical and syntactical errors in the front-end code. In this article, we first understand the terminologies involved and then explore how to get the page source in Selenium WebDriver using Python.
What Is An HTML Page Source?
In non-technical terminology, it’s a set of instructions for browsers to display info on the screen in an aesthetic fashion. Browsers interpret these instructions in their own ways to create browser screens for the client-side. These are usually written using HyperText Markup Language (HTML), Cascading Style Sheets (CSS) & Javascript.
This entire set of HTML instructions that make a web page is called page source or HTML source, or simply source code. Website source code is a collection of source code from individual web pages.
Here’s an example of a Source Code for a basic page with a title, form, image & a submit button.
<!DOCTYPE html>
<html>
<head>
  <title>Page Source Example - LambdaTest</title>
</head>
<body>

<h2>Debug selenium testing results : LambdaTest</h2>

<img src="https://cdn.lambdatest.com/assetsnew/images/debug-selenium-testing-results.jpg" alt="debug selenium testing" width="550" height="500"><br><br>
<form action="/">
  <label for="debug">Do you debug test results using LambdaTest?</label><br>
  <input type="text" id="debug" name="debug" value="Of-course!"><br>
<br>
  <input type="submit" value="Submit">
</form> <br><br>
<button type="button" onclick="alert('Page Source Example : LambdaTest!')">Click Me!</button>
</body>
</html>
What Is An HTML Web Element?
The easiest way to describe an HTML web element would be, “any HTML tag that constitutes the HTML page source code is a web Element.” It could be an HTML code block, an independent HTML tag like </br>, a media object on the web page – image, audio, video, a JS function or even a JSON object wrapped within <script> </script> tags.
In the above example – <title> is an HTML web element, so is
and the children of body tags are HTML web elements too i.e., <img>, <button> etc.
How To Get Page Source In Selenium WebDriver Using Python?
Selenium WebDriver is a robust automation testing tool and provides automation test engineers with a diverse set of ready-to-use APIs. And to make Selenium WebDriver get page source, Selenium Python bindings provide us with a driver function called page_source to get the HTML source of the currently active URL in the browser.
Alternatively, we can also use the “GET” function of Python’s request library to load the page source. Another way is to execute javascript using the driver function execute_script and make Selenium WebDriver get page source in Python. A not-recommended way of getting page source is using XPath in tandem with “view-source:” URL. Let’s explore examples for these four ways of how to get page source in Selenium WebDriver using Python –
We’ll be using a sample small web page hosted on GitHub for all four examples. This page was created to demonstrate drag and drop testing in Selenium Python using LambdaTest.
Get HTML Page source Using driver.page_source
We’ll fetch “pynishant.github.io” in the ChromeDriver and save its content to a file named “page_source.html.” This filename could be anything of your choice. Next, we read the file’s content and print it on the terminal before closing the driver.
from selenium import webdriver

driver = webdriver.Chrome()
driver.maximize_window()
driver.get("https://pynishant.github.io/")
pageSource = driver.page_source
fileToWrite = open("page_source.html", "w")
fileToWrite.write(pageSource)
fileToWrite.close()
fileToRead = open("page_source.html", "r")
print(fileToRead.read())
fileToRead.close()
driver.quit()
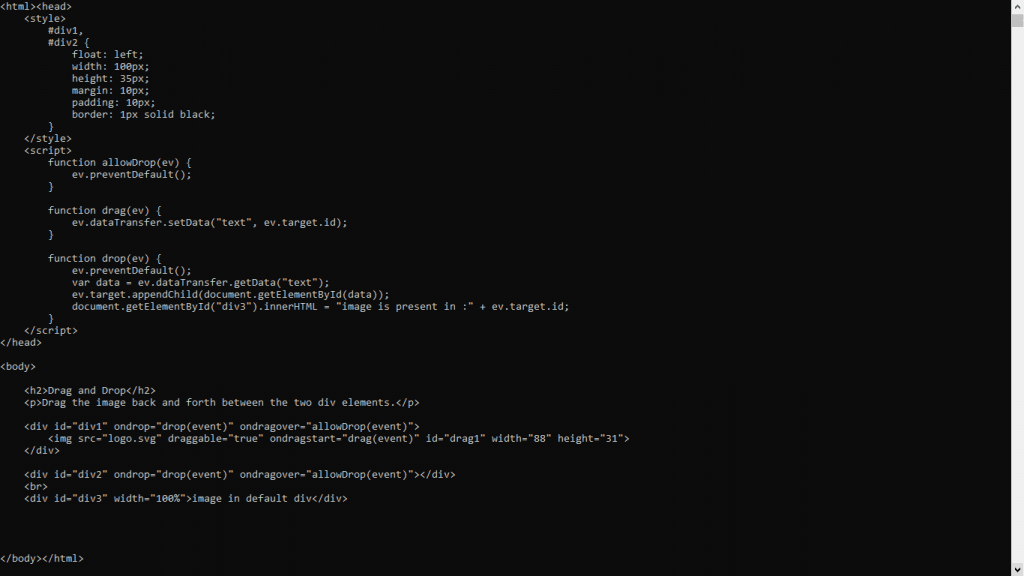
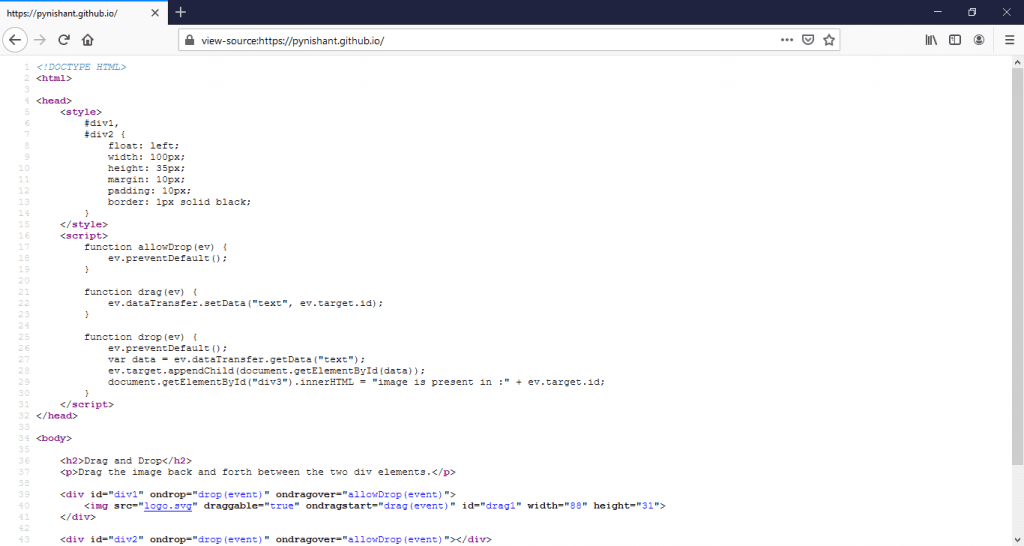
On successful execution of the above script, your terminal output will show the following page source.

Get HTML Page Source Using driver.execute_javascript
In the previous example, we have to comment out (or replace) the “driver.page_source” line and add the following line. “driver.execute_script is a Selenium Python WebDriver API to execute JS in Selenium environment. Here, we execute a JS script that returns an HTML body element.
# pageSource = driver.page_source
pageSource = driver.execute_script("return document.body.innerHTML;")
The output code looks like this-

As you can observe, it only returns the innerHTML of the body element. Like the last output, we do not get the whole page source. To get the entire document, we execute “document.documentElement.outerHTML”. The execute_script line now looks like this-
pageSource = driver.execute_script("return document.documentElement.outerHTML;")
This gives us precisely the output we got using “driver.page_source.”
Fetch Page Source Using Python’s Request Library In Selenium WebDriver. This method has nothing to do with Selenium, it’s a purely ‘Pythonic’ way to get a webpage source. Here, we use Python’s request library to make a get request to the URL and save the request’s response, i.e., page source to an HTML file and print on the terminal.
Here is the script –
import requests
url = 'https://pynishant.github.io/'
pythonResponse = requests.get(url)
fileToWrite = open("py_source.html", "w")
fileToWrite.write(pythonResponse.text)
fileToWrite.close()
fileToRead = open("py_source.html", "r")
print(fileToRead.read())
fileToRead.close()
This method can be used to quickly store a webpage source code without loading the page in the Selenium-controlled browser. Similarly, we can use the urllib Python library to fetch the HTML page source.
Get HTML Page Source Using “view-source:” URL
This is rarely required, but you can append the target URL with “view-source” and load it in the browser window to load the source code and save it in manual testing.

Programmatically to take source code of screenshots in Python Selenium (if required), you can load the page using –
driver.get("view-source:https://pynishant.github.io/")
Get HTML Page Source In Selenium Python WebDriver Using XPath
The fourth method to make Selenium WebDriver get a page source is to use XPath for saving it. Here, instead of page_source or executing JavaScript we identify the source element, i.e., <html> and extract it. Comment out the previous page source fetching logic and replace it with the following-
# pageSource = driver.page_source
pageSource = driver.find_element_by_xpath("//*").get_attribute("outerHTML")
In the above script, we are using a driver method, “find_element_by_xpath,” to locate the web page’s HTML element. We enter the document using source node – "//*" and get its “outer HTML,” which is the document itself. The output looks the same as we got earlier using driver.page_source.
How To Retrieve HTML Source Of WebElement In Selenium?
To get the HTML source of a WebElement in Selenium WebDriver, we can use the get_attribute method of the Selenium Python WebDriver. First, we grab the HTML WebElement using driver element locator methods like (find_element_by_xpath or find_element_by_css_selector). Next, we apply the get_attribute() method on this grabbed element to get it’s HTML source.
Suppose, from pynishant.github.io, and we want to grab and print the source code of the div with id “div1”. The code for this looks like this-
from selenium import webdriver

driver = webdriver.Chrome()
driver.maximize_window()
driver.get("https://pynishant.github.io/")
elementSource = driver.find_element_by_id("div1").get_attribute("outerHTML")
print(elementSource)
driver.quit()
Here’s the output –

Similarly, to get the children or innerHTML of a WebElement –
driver.find_element_by_id("some_id_or_selector").get_attribute("innerHTML")
There is an alternative way of doing this and achieving same result –
elementSource = driver.find_element_by_id("id_selector_as_per_requirement")
driver.execute_script("return arguments[0].innerHTML;", elementSource)
How To Retrieve JSON Data From An HTML Page Source In Python Selenium WebDriver?
Modern applications are built with multiple APIs at play. And often, these API dynamically change the content of HTML elements. JSON objects have emerged as an alternative to XML response types. So, it has become essential for a pro Selenium python tester to handle JSON objects, especially those embedded in <script> HTML tags. Python provides us with an in-built JSON library to experiment with JSON objects.
To demonstrate with an example – we load “https://www.cntraveller.in/” in Selenium driver and look-out for SEO schema contained in <script type=”application/ld+json”> </script> to verify that logo URL is included in the “JSON” schema. By the way, if you feel confused, this “SEO schema” is useful to get web pages ranked on google. It has nothing to do with code-logic or testing. We’re using it just for demonstration.
We’ll be using LambdaTest for this demo-
from selenium import webdriver
import json
import re
username = "hustlewiz247"
accessToken = "1BtTGpkzkYeOKJiUdivkWxvmHQppbahpev3DpcSfV460bXq0GC"
gridUrl = "hub.lambdatest.com/wd/hub"
desired_cap = {
    'platform' : "win10",
    'browserName' : "chrome",
    'version' :  "71.0",
    "resolution": "1024x768",
    "name": "LambdaTest json object test ",
    "build": "LambdaTest json object test",
    "network": True,
    "video": True,
    "visual": True,
    "console": True,
}
url = "https://"+username+":"+accessToken+"@"+gridUrl
print("Initiating remote driver on platform: "+desired_cap["platform"]+" browser: "+desired_cap["browserName"]+" version: "+desired_cap["version"])
driver = webdriver.Remote(
    desired_capabilities=desired_cap,
    command_executor= url
)
# driver = webdriver.Chrome()
driver.maximize_window()
driver.get("https://www.cntraveller.in/")
jsonSource = driver.find_element_by_xpath("//script[contains(text(),'logo') and contains(@type, 'json')]").get_attribute('text')
jsonSource = re.sub(";","",jsonSource)
jsonSource = json.loads(jsonSource)

if "logo" in jsonSource:
    print("\n logoURL : " + str(jsonSource["logo"]))
else:
    print("JSON Schema has no logo url.")
try:
    if "telephone" in jsonSource:
        print(jsonSource["telephone"])
    else:
        print("No Telephone - here is the source code :\n")
        print(driver.find_element_by_xpath("//script[contains(text(),'logo') and contains(@type, 'json')]").get_attribute('outerHTML'))
except Exception as e:
    print(e)
driver.quit()
The output contains logoURL and webElement source –


Code Breakdown
The following three lines import required libraries: Selenium WebDriver, Python’s JSON, and re library to handle JSON objects and use regular expressions.
from selenium import webdriver
import json
import re

Next, we configure our script for running it successfully on LambdaTest’s cloud, which is quite fast and smooth. It took me less than 30 seconds to get started (maybe because I had prior experience with the platform). But even if you are a first-timer, it would take less than 1 minute. Register and login using Google and click on Profile to copy your username and access token.
username = "your_username_on_lambdaTest"
accessToken = "your lambdaTest access token"
gridUrl = "hub.lambdatest.com/wd/hub"
desired_cap = {
    'platform' : "win10",
    'browserName' : "chrome",
    'version' :  "71.0",
    "resolution": "1024x768",
    "name": "LambdaTest json object test ",
    "build": "LambdaTest json object test",
    "network": True,
    "video": True,
    "visual": True,
    "console": True,
}
url = "https://"+username+":"+accessToken+"@"+gridUrl
We launch the driver in full-screen mode and load the cntraveller home page with the following line of code –
driver = webdriver.Remote(
    desired_capabilities=desired_cap,
    command_executor= url
)
# driver = webdriver.Chrome()
driver.maximize_window()
driver.get("https://www.cntraveller.in/")
Now, we locate JSON objects containing script using XPath locator and delete the unnecessary semicolons to load the string in JSON format properly.
jsonSource = driver.find_element_by_xpath("//script[contains(text(),'logo') and contains(@type, 'json')]").get_attribute('text')
jsonSource = re.sub(";","",jsonSource)
jsonSource = json.loads(jsonSource)
And then, we check if the logo URL is present. If present, we print it.
if "logo" in jsonSource:
    print("\n logoURL : " + str(jsonSource["logo"]))
else:
    print("JSON Schema has no logo url.")
Also, we check if the telephone detail is present. If not, we print the source code of the WebElement.
try:
    if "telephone" in jsonSource:
        print(jsonSource["telephone"])
    else:
        print("No Telephone - here is the source code :\n")
        print(driver.find_element_by_xpath("//script[contains(text(),'logo') and contains(@type, 'json')]").get_attribute('outerHTML'))
except Exception as e:
    print(e)
Lastly, we quit the driver.
driver.quit()
How To Get Page Source As XML In Selenium WebDriver?
If you’re loading an XML-rendered website, you may want to save the XML response. Here’s a working solution for making Selenium get XML page source –
drive.execute_script(‘return document.getElementById(“webkit-xml-viewer-source-xml”).innerHTML’)
Conclusion
You can use any of the above-demonstrated methods and leverage the agility & scalability of LambdaTest Selenium Grid cloud to automate your test processes. It lets you execute your test cases on 2000+ browsers, operating systems, and their versions. Also, you can integrate the automation testing flow with modern CI/CD tools and adhere to the best continuous testing practices.
So, start automating your day-to-day tasks and make your life easier with LambdaTest right away.
Happy Testing!
