App Actions & Slices — Extending your app to Google Search & Google Assistant
How to create a simple Slice for your app & let users perform tasks outside of the app with a richer UI.
This article is for developers who are just getting started with App Actions & Slices.
Please note that at the time of writing this article, creating App Actions hadn’t been made available by Google. Here is a form which you can fill to get notified when it becomes available.
Nonetheless, we can create Slices, and that’s what the main focus of this article will be.
But first, let’s talk about what App Actions and Slices are, and how they relate to each other.
What are App Actions?

Screenshot from the official App Actions page
App Actions are a way to provide your user a richer user experience by letting them perform actions outside of your app. This could be in the Google Search, or your Android launcher, or even the Google Assistant. It would look something like the screenshot here if you searched for a movie. Notice the last 2 search results here; they are App Actions.
Let’s consider another example: you could long press the Home button to open up the Google Assistant and all you’d need to do to get a ride to work would be to start typing, “work” and it would show you a result that upon clicking directly orders a Uber for you to go to work. 🎉
Compare this to what you would normally have to do to get an Uber, and you have made your life easier, probably because doing the very same task with App Actions takes about 8 seconds, while it would take longer doing it the usual way! 😛
Now, what are Slices?
The two concepts, App Actions and Slices, can be very confusing to differentiate at first.
Basically, you could say that Slices are super-charged App Actions. ⚡️
Slices are small pieces of UI that show up outside of your app and what they do to enrich your App Actions is that they enable your user to see and access certain interactions , images , text , and even videos from your app!
Slices are stand-alone and interactive. They provide the user with the relevant action he/she can perform outside of the full app experience, i.e. without the user having to open the app every time.
Let’s get started with building our first Slice…
You’ll need Android Studio 3.2 and the SliceViewer installed on your phone; this can be downloaded from here. Also note that this tutorial will be in Kotlin.
Here is the sample app for this article:
Step 1: Add the Slice dependencies
Add the following lines to your app-level build.gradle file’s dependencies:
implementation "androidx.slice:slice-builders-ktx:1.0.0-alpha6"
implementation "androidx.annotation:annotation:1.0.0"
Step 2: Create a SliceProvider to handle all Slices
You’ll need a SliceProvider class to provide all Slices in your app to the Android OS. The Slices that you create are identified by a Uri and your SliceProvider provides Slices based on the Uri that it receives.
To do this, click on File > New > Other > Slice Provider.
You’ll see a dialog with the following fields:
- **Class Name ** — this will be the name of your
SliceProviderclass. In this example, it’sMySliceProvider. - URI Authorities — this is something that I’d recommend keeping the same as your package name. In this example, it’s
com.bapspatil.slicesplayground. - Host URL — this would be your domain name. In this example, it’s bapspatil.com.
- URI Authorities — this is with reference to the Host URL, it’s something maps to our
SliceProviderfrom the Host URL. You can just set this to/hellofor now.
This step adds a provider to your AndroidManifest.xml file:
Step 3: Implement the onBindSlice method in your SliceProvider
The onBindSlice method returns a Slice, which is recognised by a Uri that is passed to onBindSlice as a parameter. We need to implement the onBindSlice method to create a Slice for a specific Uri as follows:
Step 4: Creating the SliceAction for the Slice
In the above implementation of the onBindSlice method, we’ve initiated a variable activityAction with a call to the method createActivityAction(). This returns a SliceAction.
A SliceAction is used to handle clicks on the Slice, and without setting the primaryAction in the row to a SliceAction i.e. setting a null value to the primaryAction, the Slice just won’t show up.
So here’s how we create a SliceAction:
We’re now done with creating our Slice!
How do I view my Slice?
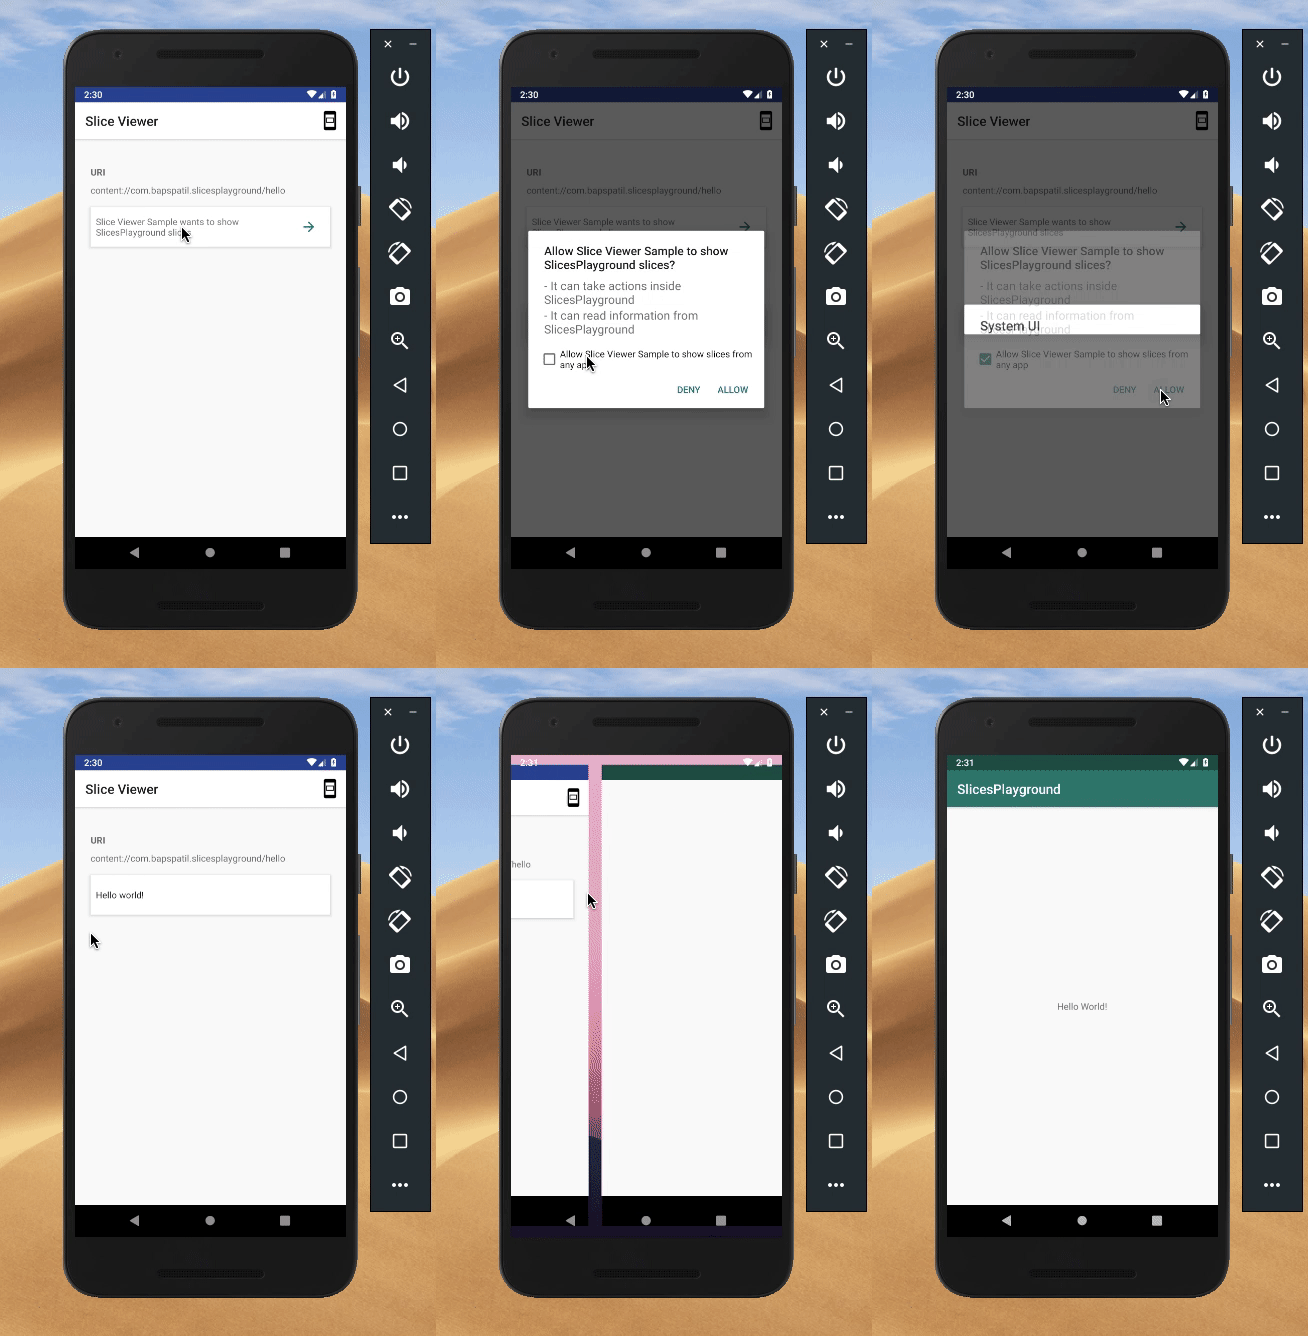
Once you have the SliceViewer tool installed on your phone, you’ll need to add a new Run Configuration in Android Studio to test your Slice.
- Click on Run > Edit Configurations…
- Click the + button and select Android App , and set the name of the configuration to
slice, in the Name field. - Under Launch Options , change the value of Launch from the drop-down to URL , and set the URL to
slice-content://com.bapspatil.slicesplayground/hello, which is your authority name from theAndroidManifest.xmlfile, followed by theUripath of the Slice that you want to view.

And that’s it. Connect your device and click on Run after selecting the slice configuration and give SliceViewer permission from the prompt on the screen to view your Slice and see it in action! 📱🎊

The source code for the demo app in this article can be found here:
You can also find me and all my socials here:
