A Practical Guide To Android App Bundle For Beginners
Exploring the new app publishing format for Google Play…
Android App Bundle is an app publishing format by Google which supports downloading parts of your app when needed only, that’s a much better alternative to building a single, universal APK for your Android app, and all this without you having to refactor your code! 😉
Android App Bundles have the file extension .aab and are an alternative to uploading your APKs to the Google Play Console. Your app’s APK gets generated dynamically for each user when they install it from the Google Play Store according to the user’s device configuration. That way, they only download the resources and code for your app that they need.
Hence, resulting in a smaller app size!
In this article, I’ll be covering how to build an Android App Bundle for your app. I’ll also be providing a sample app for this tutorial, in case anyone wants to take a look at the source code and file structure. It can be found here:
Benefits of using Android App Bundle
- **Smaller app size — ** A smaller APK size means that the users get your app at a smaller download size!
- **No more multiple APKS ** — You no longer need to manage multiple APKs! The Google Play Console handles generating and signing your APKs for you.
- **Dynamic feature modules ** — Load features in your app only when the user needs them, i.e. on-demand. These features should be present as different modules in your app’s project.
- Instant enable (coming soon) — Your users can run your app instantly without having to install your app, from a link.
Getting started…
Please note that Android App Bundle requires Android Studio 3.2 or above. At the time of writing this article, the latest beta version was Android Studio 3.2 Beta 5, so I’m gonna stick with the Android Plugin for Gradle 3.2.0-beta05 for this article.
We will build an Android App Bundle for an app that has a base module (the default app module), and two feature modules that we will load dynamically (feature1 and feature2), which will code for the features that you don’t want to include with the base version of your app and want the user to download them only when required.
Here’s what the delivery of the app modules to the user would look like:

Building Your First Android App Bundle…
Step 1:
Modify your app’s build.gradle file.
Step 2:
To build the feature1 module, go to File > New > New Module in Android Studio.
From there, select the Dynamic Feature Module that shows up in the dialog box, and click Next. From there,
- Select the
appmodule as the Base application module - Specify
feature1as the Module name - Specify a package name and a Minimum API Level for the
feature1module, and then click Next.
In the Configure On-Demand Options section,
- Specify the Module title as “Feature 1”.
- Check the boxes for Enable on-demand and Fusing. ☑️
Then click on Finish.

Step 2
Your feature1’s manifest file should have the following contents, after you’ve added an Activity to it:
And the build.gradle file for feature1 should have this in the first line, since it’s a dynamic feature:
apply plugin: 'com.android.dynamic-feature'
Repeat the above steps for feature2.
Step 3:
Let’s go back to your app’s build.gradle file and check if the dynamic features are specified as follows:
Step 4:
Now, go to your feature1 and feature2’s build.gradle files and check if your app module is added as a dependency.
Step 5:
Let’s write the code in the app module for downloading the feature1 module, when required.
Add the following dependency to your app’s build.gradle file:
implementation 'com.google.android.play:core:1.3.4'
In the Activity/Fragment where you want the dynamic feature to load on-demand, write the following code:
Again, repeat the same for feature2 as well, wherever it’s needed.
Step 6:
Under the hood, Android Studio, Gradle and Google Play use a tool called the bundletool to build your App Bundle, which is also available as a command-line tool.
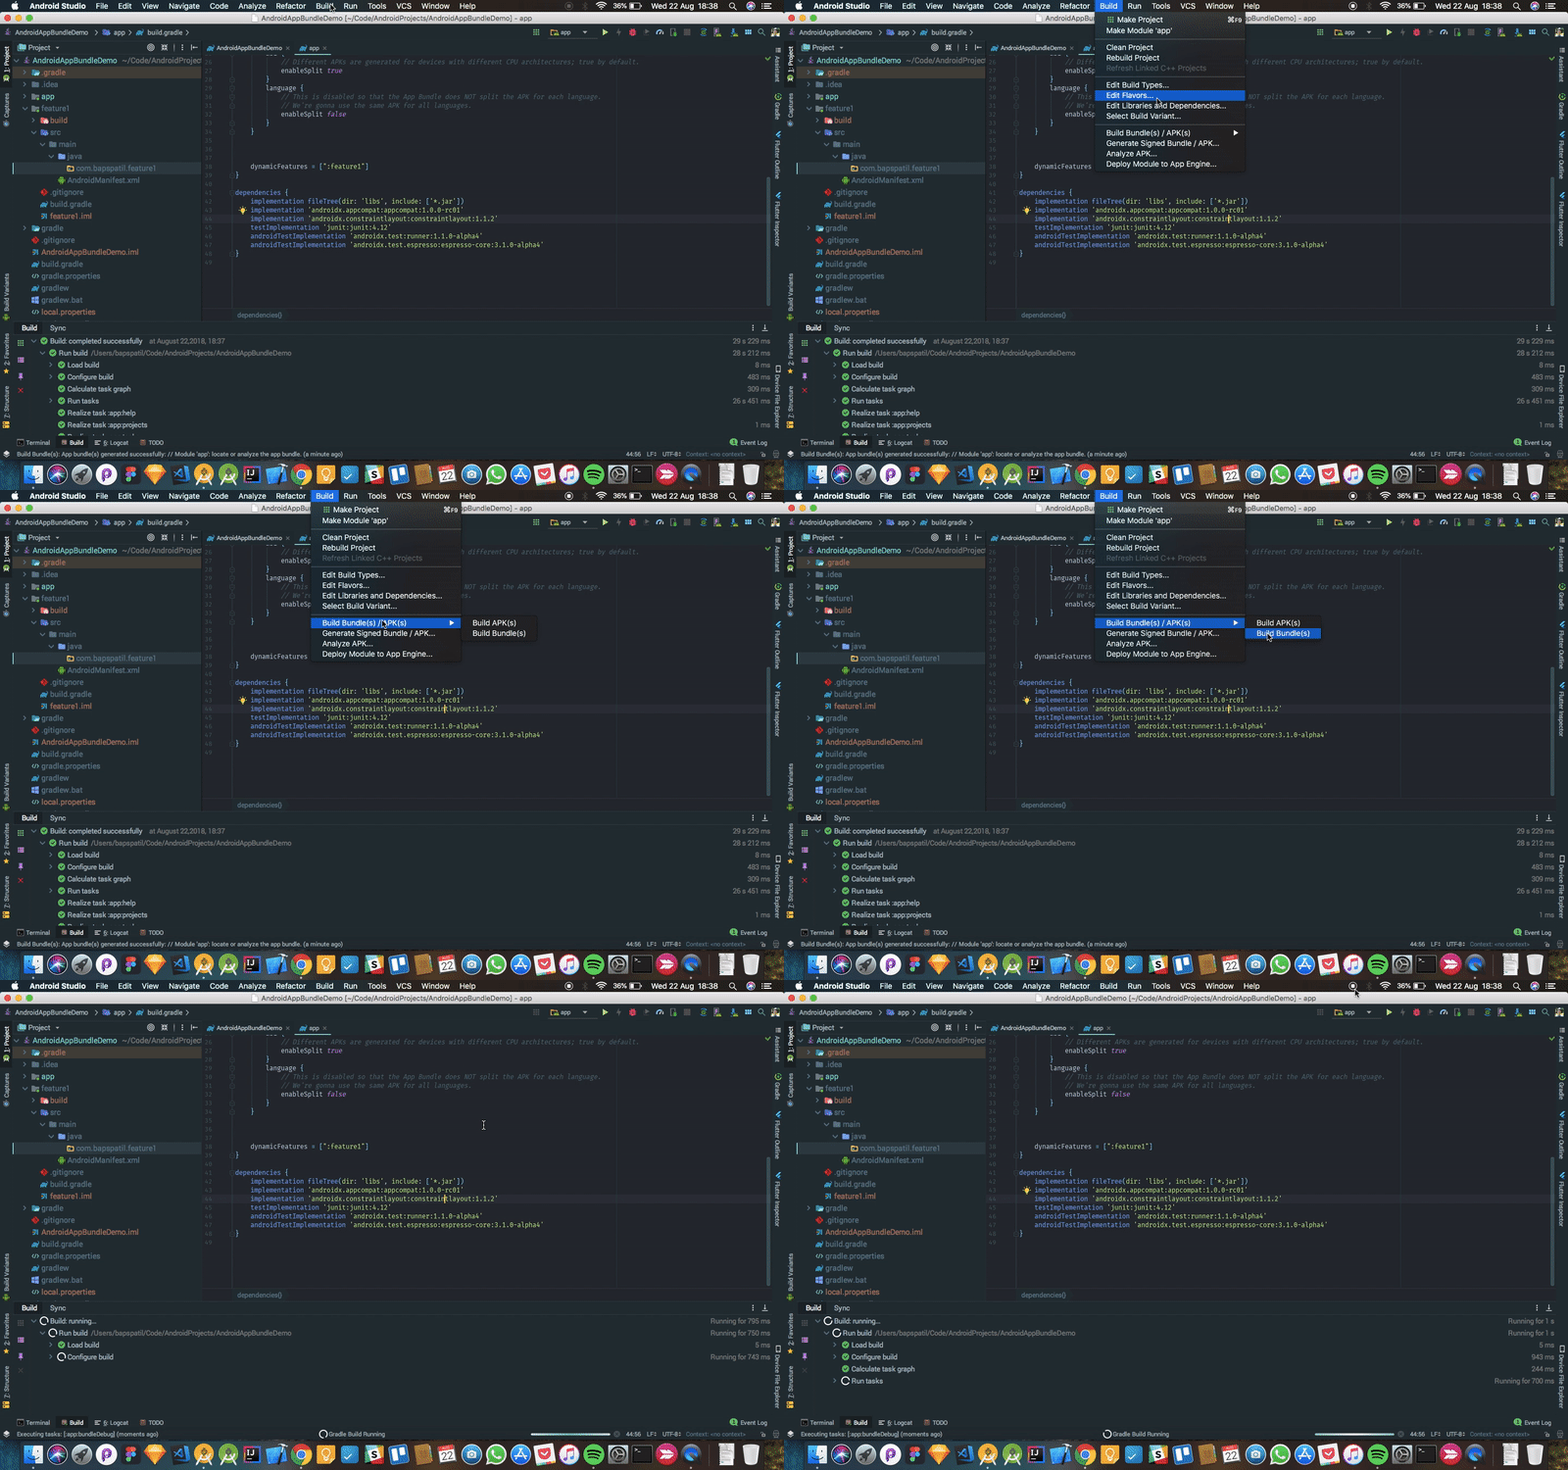
To build a debug version of your App Bundle:
Click on Build > Build Bundle(s)/APK(s) > Build Bundle(s), or you can do it in the command-line as follows:
./gradlew :base:bundleDebug

Step 6: Debug version of the Android App Bundle
The bundle can be found at: project-name/app/build/outputs/bundle/
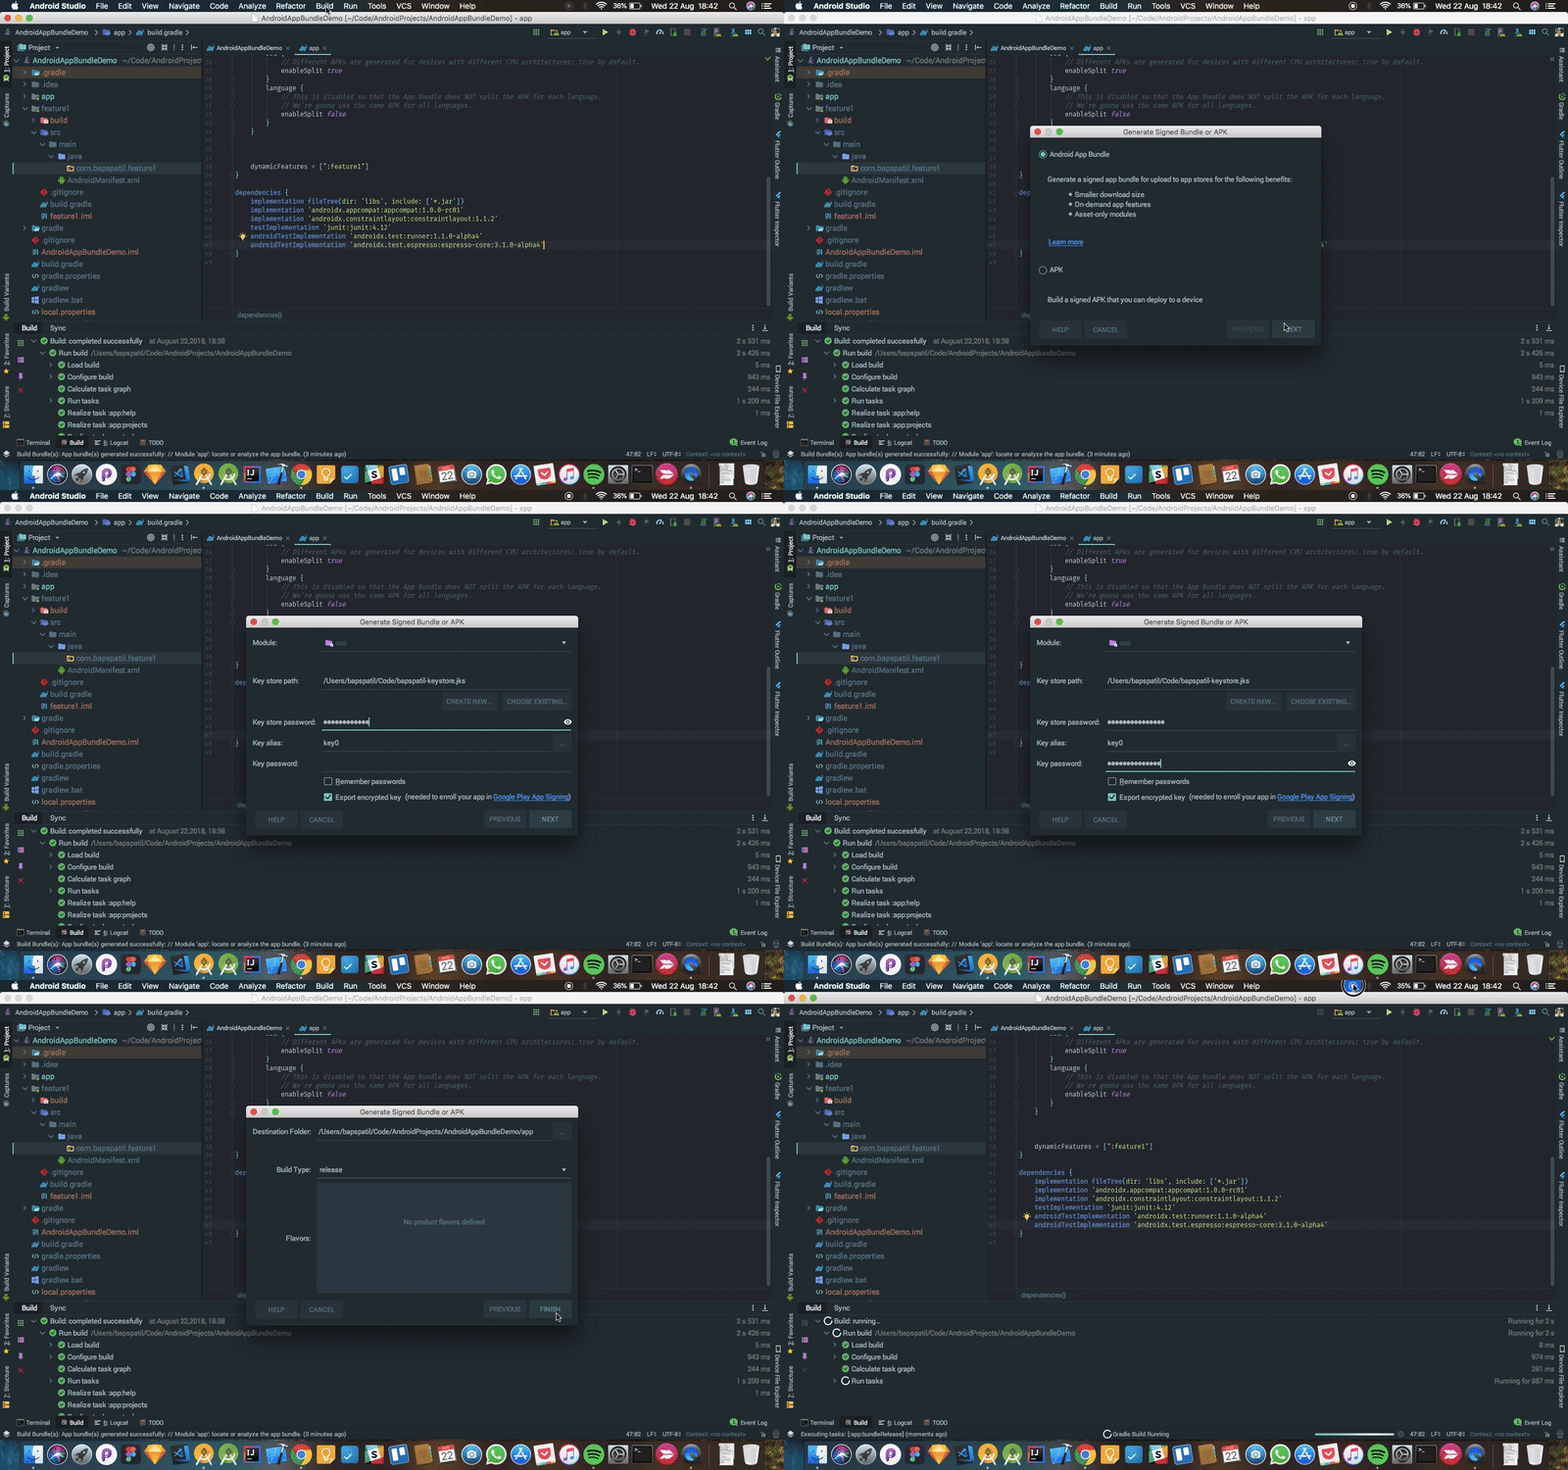
To build a signed, release version of your App Bundle to upload to your Google Play Console:
- Click on Build > Generate Signed Bundle/APK , then select Android App Bundle and click Next.
- Then select the
appmodule from the Module dropdown 🔽, which is your base module for which the App Bundle is built. - Type in the details of your key after selecting your keystore, just as you normally would to sign an APK. In this step, I’d recommend checking the Export encrypted key checkbox ☑️. You’ll need to upload this encrypted key file to Google Play Console later. Click Next after you’re done here.
- Select your Destination Folder and select the
releasein Build Types & all the flavors in Flavors you want to build your App Bundle for, and then click Finish.

Step 6: Release version of the Android App Bundle
Uploading to the Google Play Console:
- Make sure you’re enrolled in the app signing by Google Play.
- Apply for the Dynamic Features Beta Program here.
Once you’re granted access, you can publish your Android App Bundle to production!
…And that’s it. You’re done with your first Android App Bundle!
The source code for my demo app for building an Android App Bundle can be found here:
You can also find me and all my socials here:

As you all know that the Android App Bundle is the app publishing format. So, this is the best guide I have seen after the https://microsoftsupport.co/microsoft-support-uk/ So, this guide is really helpful for me.