Building a SPA with React and Okta for authentication.
I recently had a close friend pitch me an idea to build a customized inventory management application for his organization.
After the idea pitch, I began doing some research on how this would come to life, part of this research(thinking and googling) centered around the authentication experience for new users in this case employees of the organization.
I came up with a couple of flows which all seemed like a good option but then would require a lot of resources and code to bring them to life and as with software the more code we write the more likely we are to face bugs etc.
Another issue I encountered was that this application was an organizational type application, meaning we could have multiple applications built and managed by the organization. would I have to go through these authentications and authorization dilemma each time we need to build a new app for the organization?
More research led me into considering an organizational-wide authentication microservice such that each application added to the organization can make use of this service to give or deny access to users for each of the organization's applications😰. I am but one man! Tho feasible, I knew my thoughts may not scale-out nicely and would require a decent amount of resources, time, funds, devs, etc, I'd basically have to form my own small tech company within my friends leather works startup 🤦🏽♂️.
I knew I had to come up with a better solution, thus I thought Okta!!!
Why Okta?
Okta is a user identity management platform that enables companies and developers to handle and manage authentication for their applications and their products.
Okta as a product has two major offerings as listed on the companies website
- Workforce Identity: Protect and enable employees, contractors, and partners.
Workforce Identity allows you to easily sign-in to all the applications your organization uses through a single login. Once you sign in, your Okta home page displays all your applications in one location. Simply, click the application's corresponding icon and each application opens in a new browser window or tab and you are automatically logged-in. Read more
- Customer Identity: Build secure, seamless experiences for your customers.
For this article I would like to prototype my solution, we would be focusing on a little bit on both Okta offering, basically how we manage users' authentication as an organization and how new users get to access our organization's application(s).
What we aim to achieve
- create a simple react app bootstrapped by create-react-app
- create a developers account on Okta and register our organization and our first organization-wide application
- Build a custom Okta based authentication into our react app to enable assigned users to log in to our app.
- Manage employees access and identity by assigning roles and application access to different users
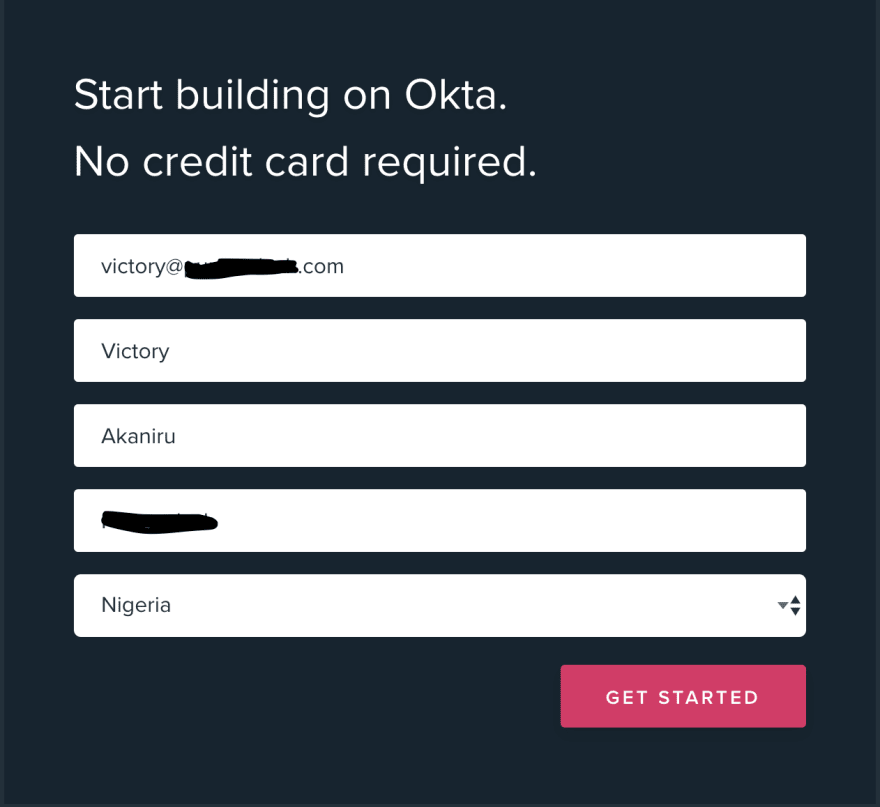
To get started we need to sign up for an Okta developers account here
You should see a form like this
Complete the form check your email for your activation email and follow the ACTIVATE MY ACCOUNT button. Change your password, fill the other information and click Create My Account.
You should have this dashboard on your screen at this point. 🎉
Now that we have our Okta account ready we need to create an application or select from the list of supported Okta applications like gsuite, slack, etc and then invite/assign users(employees) to use these applications.
With these next few steps, you can start seeing parts of our solution form. Organizations have countless applications they subscribe to and give access to their employees. with Okta we can decide who uses what.
we can add a user(employee) and also assign an organizational app to that user.
Add a user
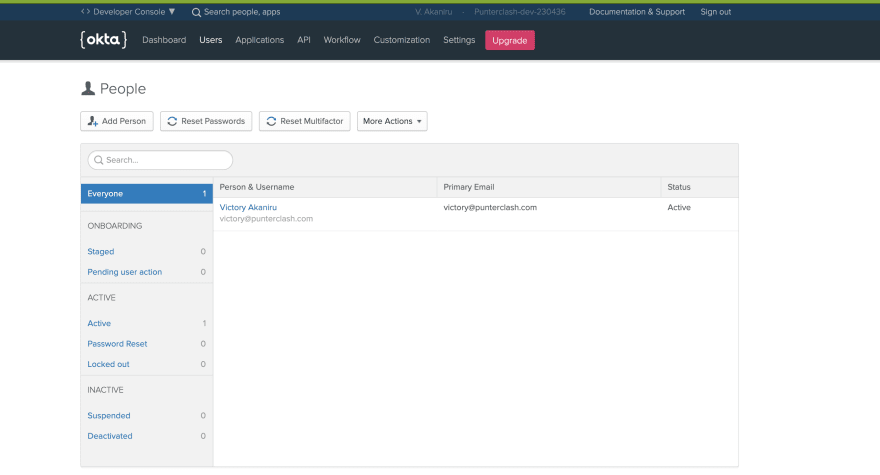
To do this select Users > People from the second navigation tab on your Okta dashboard.
You would be redirected to this page
Click on Add Person. Fill up the form on the modal that pops up and hit Save.

You can add as many users as you like. If you want those users grouped for access control you can click the groups button on the modal and create different groups. eg Admin, Management, Visitors
Add an App
To do this select Users > People from the second navigation tab on your Okta dashboard.
You would be redirected to this page
Notice that on the right-hand side we only have one user, which is me. If you followed the above step you would have multiple users listed here.
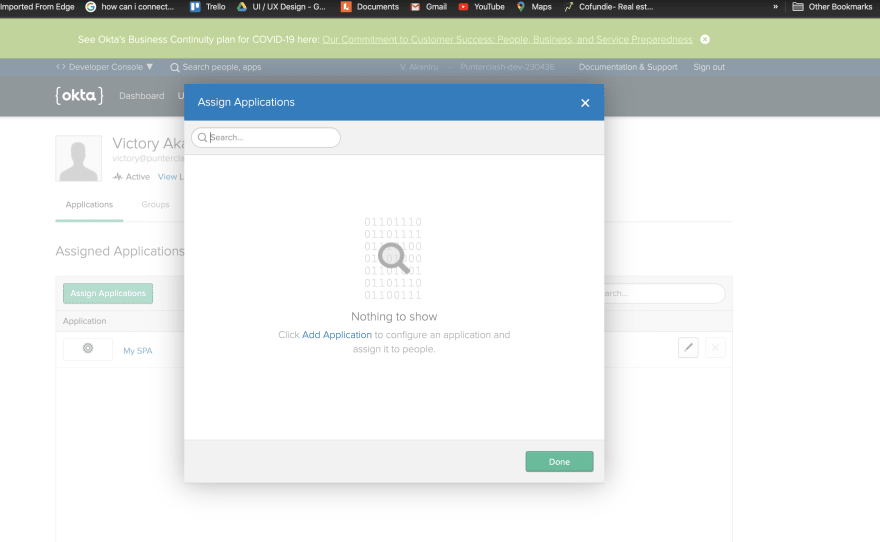
- Click on any user >
Assign apps.
we should see a screen saying we don't have any application
Click Add Application. And you'll be redirected to this page
with this, we can either select an application our organization members can have access to like gsuite and or add our first custom organization application!
Click on Create New App on the top left, a modal should pop up like so
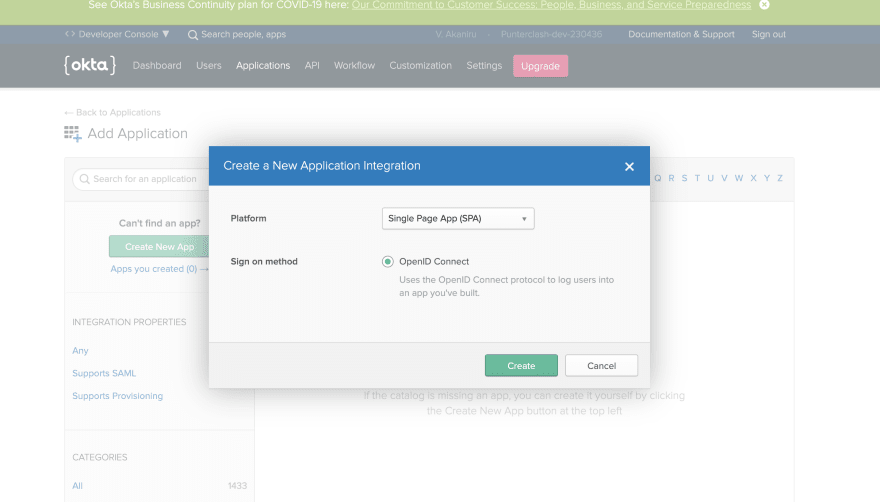
Since we'll be building a SPA select SPA from the drop-down and click create. By default, all SPA's on Okta uses an industry-standard OpenId connect. Click Create app which would redirect you to this page
Provide the name of your app and add a redirect URL as I have. you can use any preferred port... Finally hit Save
On the new dashboard for your app click the Assign button. You'll notice we can assign to individuals or groups. Okta automatically creates an, Everyone group for you, this happens to be one of Okta's solutions I like a lot because I could create more groups and add my users to any of these groups when I invite them and they would have access to all applications available to that group. I could also assign to people individually. for now, click on Groups and assign to everyone
Finally, navigate to the general tab, scroll to the bottom and copy your clientId because it's time to write some code 🎉
Setup sometimes may endure for a night but code comes in the morning... still UNKNOWN 😰
Building out the react app 🏌🏼
Now we need to create a react app and add the Okta authentication SDK to it such that only users we invite to our Okta org or assign to an app can have access to it!
Open up your terminal
- cd documents
- npx create-react-app spa-okta --template typescript
- cd spa-okta
- npm i semantic-ui-react semantic-ui-css @okta/okta-react @okta/okta-signin-widget dotenv
- cd src
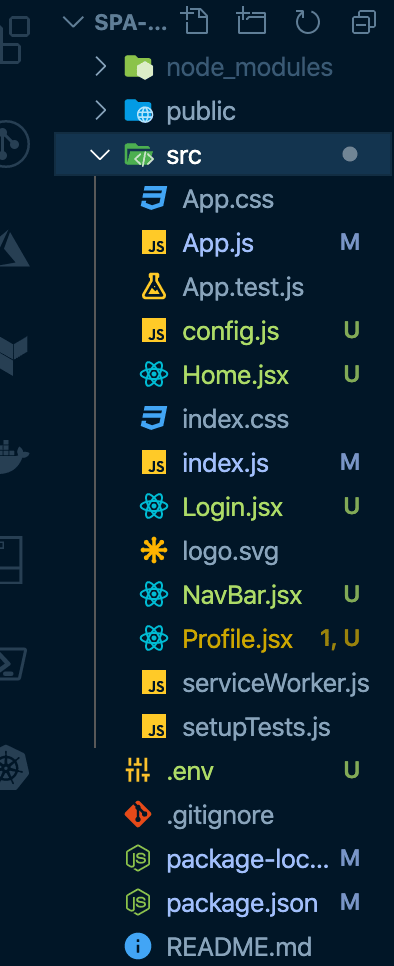
- touch config.js Home.jsx Profile.jsx NavBar.jsx
We created a new project called spa-okta which is bootstrapped by the create-react-app template. This enables us to skip all the tooling and configurations for webpack and focus on what really matters.
We installed
- semantic UI so we can change the appearance of the Okta form to suit our needs
@okta/okta-reactthis gives us access to some components from Okta which we would use on our app.- Okta Sign-In Widget is a JavaScript library that gives you a fully-featured and customizable login experience that can be used to authenticate users on any website.
- dotenv to enable access to environmental variables
We also created some files which would hold our components your project structure should look like this at this point
configurations
In src/index just above the ReactDOM.render function add
import 'semantic-ui-css/semantic.min.css';
This ensures global access to semantic UI's properties within our application.
Add the following code in your src/config.js file
const CLIENT_ID = process.env.CLIENT_ID;
const ISSUER = process.env.ISSUER export default { clientId: CLIENT_ID, issuer: ISSUER, redirectUri: 'http://localhost:8082/implicit/callback', scopes: ['openid', 'profile', 'email'], pkce: true, disableHttpsCheck: false,
};
Here we are exporting an object with the basic configurations needed to get Okta running smoothly.
In your .env file add
CLIENT_ID=
ISSUER='issuerId/oauth2/default'
Remember your CLIENT_ID? paste it here. As for ISSUER,value you can get that from your Okta dashboard.
Building the components
With that done we need to create three components that show what we can do with Okta. we need to add a Home, Navbar, Login and finally a Profile component that would be protected and can only be accessed after successful sign-in.
we'll start with the Login component... Add the following code. since we'll be building our custom Login component we need to do a little bit more. see
import React, { useEffect } from 'react';
import * as OktaSignIn from '@okta/okta-signin-widget';
import '@okta/okta-signin-widget/dist/css/okta-sign-in.min.css'; import config from './config'; const Login = () => { useEffect(() => { const { pkce, issuer, clientId, redirectUri, scopes } = config; const widget = new OktaSignIn({ /*** Note: when using the Sign-In Widget for an OIDC flow, it still * needs to be configured with the base URL for your Okta Org. Here * we derive it from the given issuer for convenience. */ baseUrl: issuer ? issuer.split('/oauth2')[0] : '', clientId, redirectUri, logo: '/react.svg', i18n: { en: { 'primaryauth.title': 'Sign in to React & Company', }, }, authParams: { pkce, issuer, display: 'page', scopes, }, }); widget.renderEl( { el: '#sign-in-widget' }, () => { /** * In this flow, the success handler will not be called because we redirect * to the Okta org for the authentication workflow. */ }, (err) => { throw err; }, ); }, []); return ( <div> <div id="sign-in-widget" /> </div>
 );
};
export default Login;
Here we created a Login component and initialized an instance of OktaSignIn when the component renders, using a hook useEffect and passed in the destructured variables from our config object. Finally, we return a div to render the widget.
Next, we need to add our NavBar component which would display different items depending on if our user is authenticated or not.
In your NavBar.tsx file add the following code
import { useOktaAuth } from '@okta/okta-react';
import React from 'react';
import { Container, Image, Menu } from 'semantic-ui-react';
import logo from './logo.svg'; const Navbar = () => { const { authState, authService } = useOktaAuth(); const login = async () => authService.login('/'); const logout = async () => authService.logout('/'); return ( <div> <Menu fixed="top" inverted> <Container> <Menu.Item as="a" header href="/"> <Image size="mini" src={logo} />
Okta-React Sample Project </Menu.Item>
{authState.isAuthenticated && <Menu.Item id="profile-button" as="a" href="/profile">Profile</Menu.Item>}
{authState.isAuthenticated && <Menu.Item id="logout-button" as="a" onClick={logout}>Logout</Menu.Item>}
{!authState.isPending && !authState.isAuthenticated && <Menu.Item as="a" onClick={login}>Login</Menu.Item>}
</Container>
</Menu>
</div>
);
};
export default Navbar;
Here we create a NavBar component using semantic UI and we also conditionally render items on the navbar depending on if the user is authenticated or not and we can tell if a user is authenticated by destructuring authState from the useOktaAuth function. we also created a login and logout redirect function based off of the authService destructured from the useOktaAuth.
Next up is our simple Home page or landing page component. In your src/Home.jsx add the snippet
import React from 'react';
import { useOktaAuth } from '@okta/okta-react'; const Home = () => { const { authState } = useOktaAuth(); return ( authState.isAuthenticated ? <p>Welcome! Click the profile button on the navBar to view your profile and some details returned by Okta!</p> : <p>This is the landing page of our tiny app.</p> )
} export default Home
We're close!
In your src/Profile.tsx file add the following code
import React, { useState, useEffect } from 'react';
import { useOktaAuth } from '@okta/okta-react';
import { Table } from 'semantic-ui-react'; const Profile = () => { const { authState, authService } = useOktaAuth(); const [userInfo, setUserInfo] = useState(null); useEffect(() => { if (!authState.isAuthenticated) { // When user isn't authenticated, forget any user info setUserInfo(null); } else { authService.getUser().then((info) => { setUserInfo(info); }); } }); if (!userInfo) { return ( <div> <p>Fetching user profile...</p>
</div>
); } return ( <div> <div> <p> Below is the information from your ID token which was obtained during the <a href="https://developer.okta.com/docs/guides/implement-auth-code-pkce">PKCE Flow</a> and is now stored in local storage.
</p>
<p>This route is protected with the <code><SecureRoute></code> component, which will ensure that this page cannot be accessed until you have authenticated.</p> <Table> <thead> <tr> <th>Claim</th><th>Value</th> </tr>
</thead>
<tbody> {Object.entries(userInfo).map((claimEntry) => { const claimName = claimEntry[0]; const claimValue = claimEntry[1]; const claimId = `claim-${claimName}`; return <tr key={claimName}><td>{claimName}</td><td id={claimId}>{claimValue}</td></tr>;
})} </tbody>
</Table>
</div>
</div>
);
}; export default Profile;
When this component is rendered we first check if the user is authenticated. if the user is authenticated we fetch their profile details from authService.getUser() which we have access to via Okta. when we get that info back we use it to update the userInfo state. finally, we loop over that information and form a semantic UI table using those details.
Bringing it all together
In your src/App.jsx file update, its contents with the following code
import React from 'react';
import { BrowserRouter as Router, Route, useHistory } from 'react-router-dom';
import { Security, SecureRoute, LoginCallback } from '@okta/okta-react';
import { Container } from 'semantic-ui-react';
import config from './config';
import CustomLoginComponent from './Login';
import Navbar from './NavBar';
import Profile from './Profile';
import Home from './Home'; const HasAccessToRouter = () => { const history = useHistory(); // example from react-router const customAuthHandler = () => { // Redirect to the /login page that has a CustomLoginComponent history.push('/login'); }; return ( <Security {...config} onAuthRequired={customAuthHandler} > <Navbar /> <Container text style={{ marginTop: '7em' }}> <Route path="/" exact component={Home} />
 <Route path="/implicit/callback" component={LoginCallback} />
 <Route path="/login" exact component={CustomLoginComponent} />
 <SecureRoute path="/profile" component={Profile} />
 </Container>
 </Security>
 );
}; const App = () => ( <div> <Router> <HasAccessToRouter /> </Router>
 </div>
); export default App;
In this file, we import all our components and the Okta config file. we create a component HasAccessToRouter which returns the Okta Security component. The security component takes two arguments, the first being our config object and the second being a callback function which redirects a user to a particular page when the user has not been authenticated and tries to access a SecureRoute in our case /profile. Finally using react-router we sandwich our HasAccessToRouter component.
That's it! To test our application
We now have our prototype app ready! only users within an organization can access this app, also users within that organization have to be assigned to this application in order to use it. You can assign more users to this application from your Okta dashboard. Okta has great but very large product documentation which played a good role in helping me complete this article, feel free to have a look here.
Find full code here. ⭐️
if you encounter cors issues, go to your dashboard on Okta, from the navbar navigate to
API > Trusted OriginsclickAdd Originand provide the details...Origin URLhas to match the port on your react app

